When it comes to controlling a light fixture from two different locations, a 3-way switch is the perfect solution. This type of switch allows you to turn the light on or off from multiple points, providing convenience and flexibility in your home.
Understanding how to wire a 3-way switch diagram is essential if you want to install this type of switch in your home. By following the correct wiring diagram, you can ensure that the switch functions properly and safely.
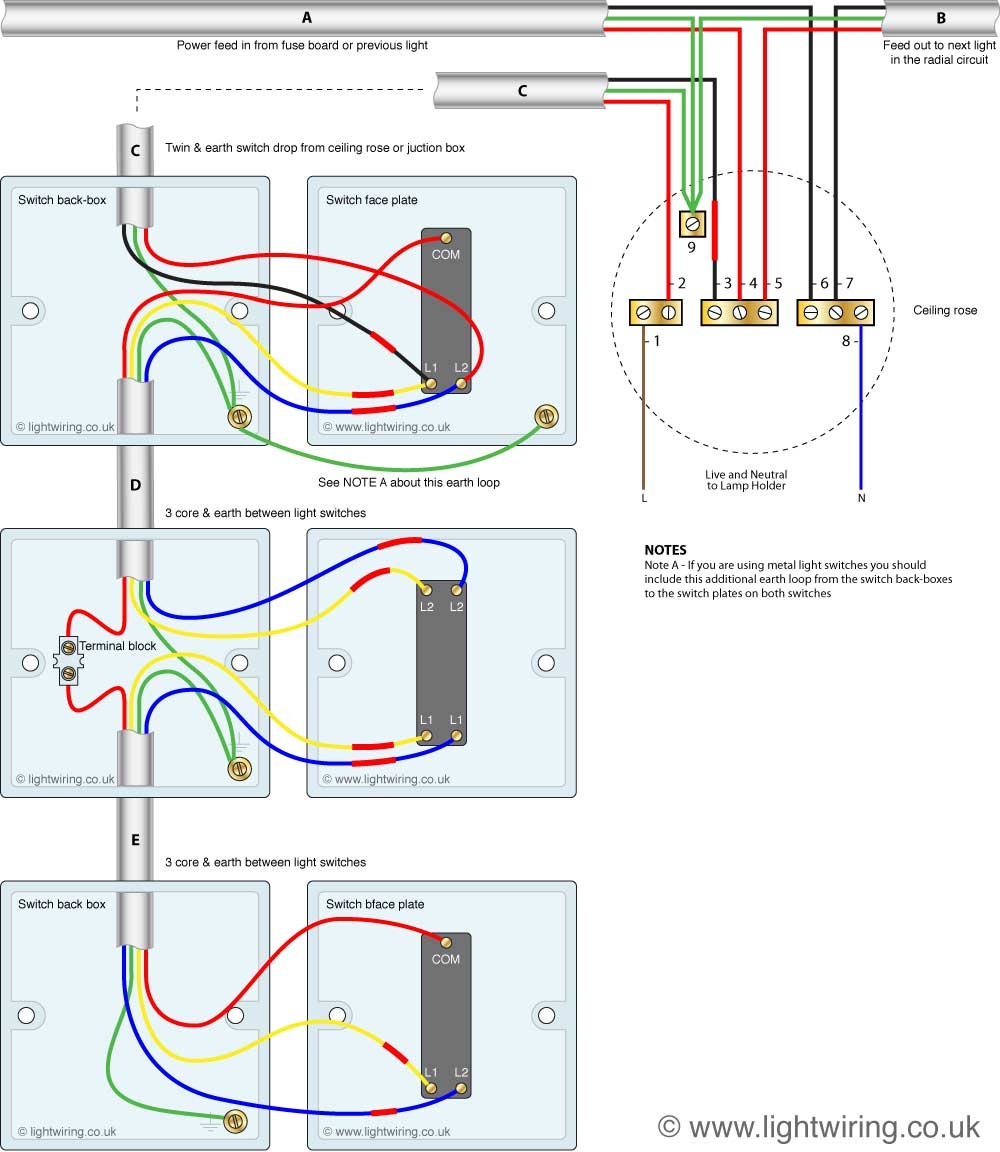
 How To Wire A 3 Way Switch Diagram For 12 Volt System (signalwires.com)
First, you will need to gather the necessary tools and materials, including a voltage tester, wire cutter/stripper, screwdrivers, and of course, the 3-way switches. Once you have everything ready, you can begin the installation process.
Start by turning off the power to the circuit at the breaker box to avoid any accidents. Then, identify the three wires that are typically connected to a 3-way switch: the hot wire, the traveler wire, and the ground wire. Using your voltage tester, determine which wire is the hot wire and mark it with a piece of tape.
Next, connect the hot wire to the common terminal of the first 3-way switch. Then, connect the traveler wire to one of the remaining terminals on the switch. Repeat this process for the second switch, making sure to connect the traveler wire to the opposite terminal. Finally, connect the ground wires to the green screw on each switch.
After all the wires are securely connected, you can turn the power back on and test the switches to ensure they are working correctly. If done properly, you should be able to control the light fixture from both locations without any issues.
Overall, wiring a 3-way switch diagram may seem daunting at first, but with the right tools and knowledge, it can be a straightforward process. By following the correct steps and ensuring all connections are secure, you can enjoy the convenience and functionality of a 3-way switch in your home.