When it comes to setting up a two way switch in your home, it’s important to understand the wiring diagram. A two way switch allows you to control a single light or fixture from two different locations. This can be useful in rooms with multiple entry points or staircases where you want to be able to turn the light on or off from either end.
Before getting started with the wiring process, make sure to turn off the power to the circuit you will be working on. It’s always best to double check with a voltage tester to ensure there is no electricity running through the wires.
 Wiring Diagram For Eagle 4 Way Switch (schematron.org)
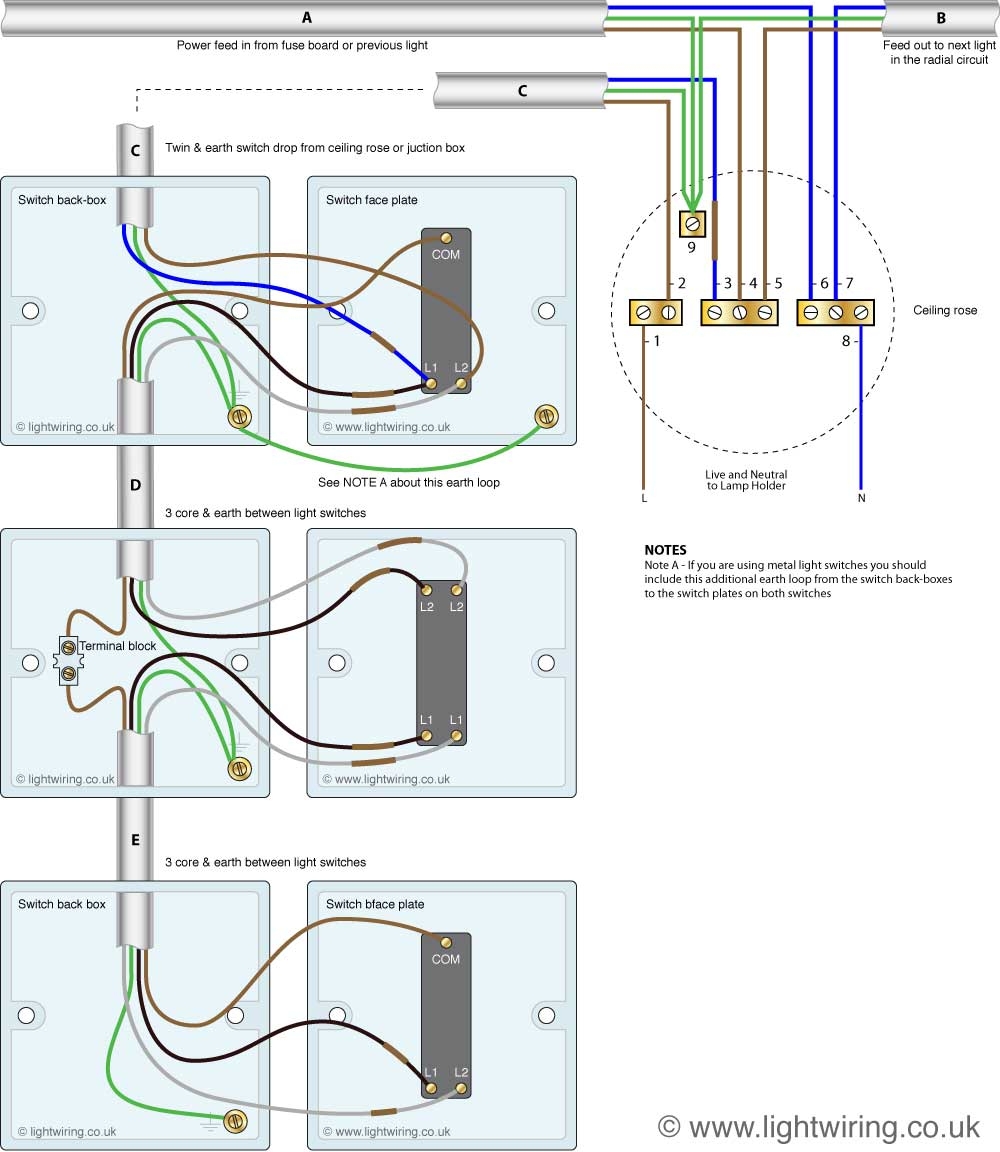
First, you will need to identify the two switches that will control the light fixture. One switch will be installed at each location, and they will be connected by a set of wires running between them. The wiring diagram will show you how to connect these wires to ensure the switches work properly.
Typically, the two way switch wiring diagram will include three terminals on each switch – common, L1, and L2. The common terminal is where the power supply is connected, while L1 and L2 are the traveler terminals. The wiring configuration will depend on the location of each switch and the direction you want the power to flow.
Once you have identified the terminals on each switch and the wiring diagram, you can start connecting the wires. Make sure to use the appropriate wire connectors and secure all connections properly. Test the switches to make sure they are working correctly before closing up the switch boxes.
In conclusion, understanding the two way switch wiring diagram is essential for setting up a multi-location lighting control system in your home. By following the diagram and connecting the wires correctly, you can easily control a single light or fixture from two different locations. Remember to always turn off the power before working on any electrical wiring projects and consult a professional if you are unsure about any steps.