When it comes to wiring a rocker switch, it is important to understand the basics of how they work. Rocker switches are commonly used in electrical circuits to control the flow of electricity. They are easy to install and can be used in a variety of applications, from automotive to industrial settings.
Before wiring a rocker switch, it is important to identify the different terminals on the switch. Most rocker switches have three terminals: one for power, one for the accessory being controlled, and one for ground. Understanding the function of each terminal is crucial for proper installation.
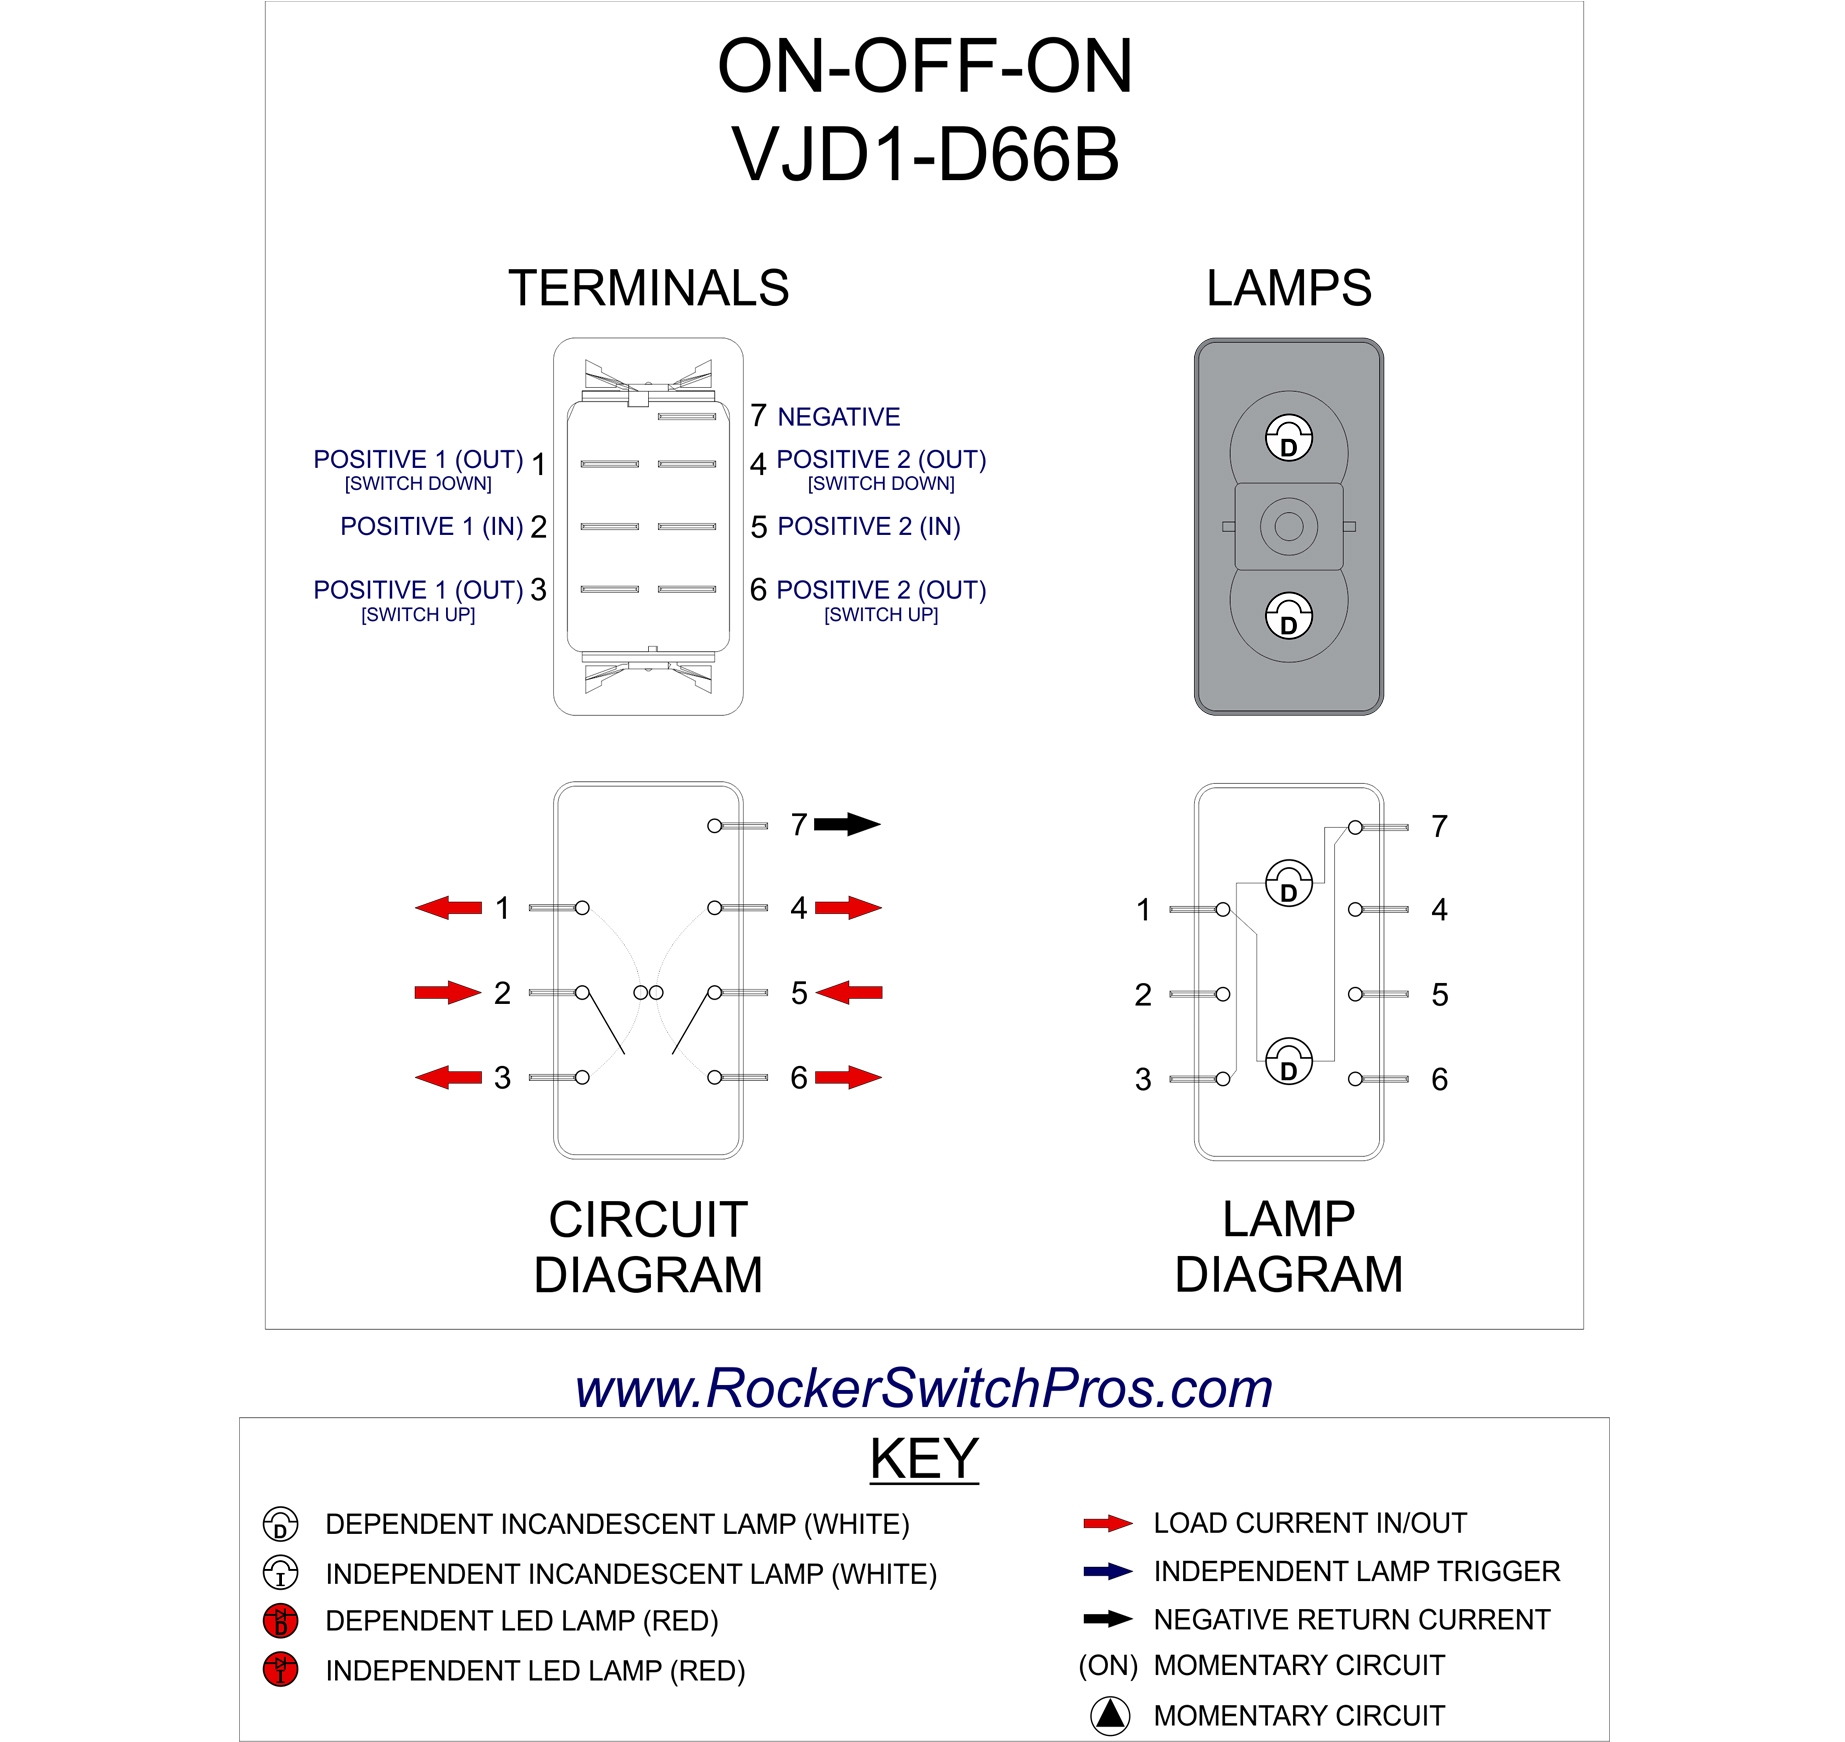
 3 Pole Rocker Switch Wiring Diagram Econess (econess46.blogspot.com)
To wire a rocker switch, start by connecting the power terminal to a power source, such as a battery or fuse box. Next, connect the accessory terminal to the device or component that you want to control with the switch. Finally, connect the ground terminal to a suitable ground point, such as the vehicle’s chassis.
It is important to use the correct gauge of wire for the rocker switch installation to ensure proper functionality and safety. It is also recommended to use a fuse or circuit breaker to protect the electrical circuit in case of a short circuit or overload.
Once the rocker switch is wired correctly, test the switch to ensure that it functions as intended. If the switch does not work properly, double-check the wiring connections and troubleshoot any potential issues before retesting.
In conclusion, wiring a rocker switch is a simple and straightforward process that can be done by anyone with basic electrical knowledge. By following the wiring diagram for the specific switch you are using, you can easily install a rocker switch in your desired application. Remember to always prioritize safety and double-check your connections before powering up the circuit.