Reverse cameras have become an essential safety feature in modern vehicles, providing drivers with a clear view of what’s behind them when backing up. Installing a reverse camera can be a great way to improve your driving experience and reduce the risk of accidents. However, understanding the wiring diagram is crucial to ensure that the camera functions correctly.
Before you begin the installation process, it’s important to familiarize yourself with the wiring diagram of the reverse camera. This diagram will show you how to connect the camera to the power source, ground, and display monitor. It will also indicate any additional components, such as a relay or switch, that may be required for proper functioning.
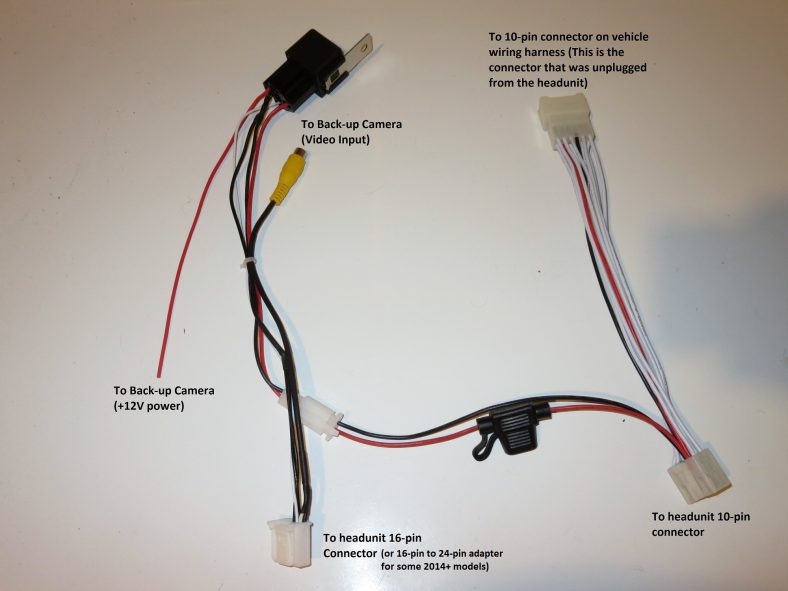
 Factory Toyota Sienna Reverse Camera Wiring Diagram (wiringall.com)
Typically, the wiring diagram will include color-coded wires that correspond to specific functions. For example, red wires are usually for power, black wires for ground, and yellow wires for video signal. Following the diagram carefully will help you avoid any mistakes that could potentially damage your camera or vehicle’s electrical system.
Once you have identified the proper connections, you can begin the installation process by routing the wires from the camera to the display monitor. It’s important to secure the wires to prevent them from getting tangled or damaged during the installation. You may need to drill holes or remove panels to properly route the wires through the vehicle.
After connecting all the wires according to the wiring diagram, you can test the reverse camera to ensure that it is working correctly. Make sure to adjust the camera angle and settings to provide you with the best view possible. Once you are satisfied with the installation, you can secure the camera and display monitor in place and tidy up any loose wires.
In conclusion, understanding the reverse camera wiring diagram is essential for a successful installation. By following the diagram carefully and making the proper connections, you can enjoy the benefits of having a clear view of what’s behind you when backing up. Remember to test the camera after installation to ensure that it is functioning correctly and make any necessary adjustments for optimal performance.