When it comes to installing a 3-way switch in your home, Leviton is a trusted brand known for their high-quality products. Understanding the wiring diagrams for Leviton 3-way switches is essential to ensure a successful installation. These diagrams provide a visual representation of how the switches should be connected, making it easier for DIY enthusiasts and electricians alike.
Whether you are replacing an existing switch or installing a new one, having a clear understanding of the wiring diagrams is crucial for a safe and effective installation. Leviton offers a range of 3-way switches that cater to different needs and preferences, so it’s important to choose the right one for your specific requirements.
 Leviton 3 Way Switch Wiring Diagram Guide (schempro.com)
One common Leviton 3-way switch wiring diagram involves two switches controlling a single light fixture. The diagram typically shows the power source, the light fixture, and the two switches connected in a specific configuration. Following the diagram step by step ensures that each wire is connected correctly, preventing any potential hazards or malfunctions.
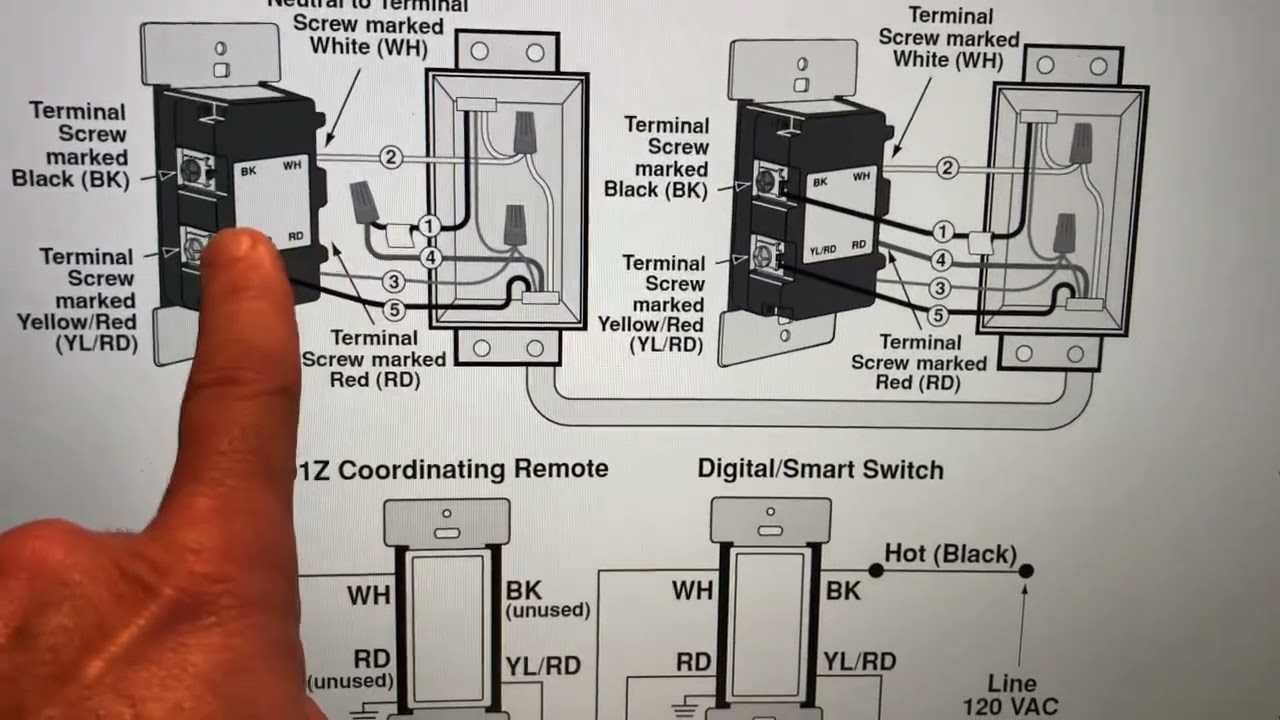
Another important aspect of Leviton 3-way switch wiring diagrams is understanding the different terminal screws and wire colors. Each terminal screw serves a specific purpose and must be connected to the corresponding wire for the switch to function properly. Additionally, identifying the correct wire colors ensures that the connections are made accurately, minimizing the risk of errors.
In conclusion, Leviton 3-way switch wiring diagrams are essential tools for anyone looking to install or replace a 3-way switch in their home. By following these diagrams carefully and paying attention to the details, you can ensure a successful and safe installation. Whether you are a DIY enthusiast or a professional electrician, having a clear understanding of the wiring diagrams is key to completing the job effectively.