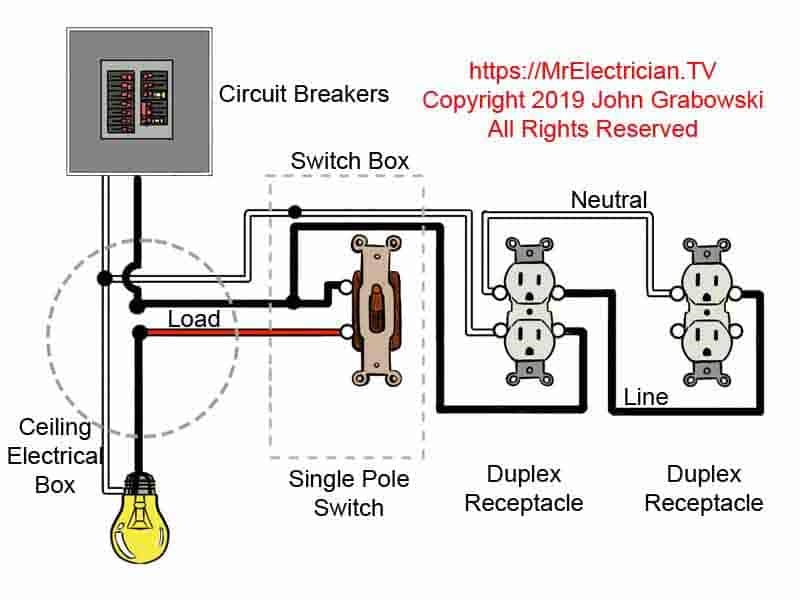
Electrical wiring diagrams for light switches are essential tools for anyone looking to install or repair lighting in their home. These diagrams provide a visual representation of how the wiring should be connected, making it easier to understand the electrical connections and ensure a safe installation.
Whether you are a DIY enthusiast or a professional electrician, having access to accurate wiring diagrams can save you time and prevent costly mistakes. By following the diagram, you can easily identify the wires that need to be connected to the light switch and ensure that the circuit is properly grounded.
 Opel Meriva B 2016 Electrical Wiring Diagrams (autoepcservice.com)
One common type of wiring diagram for a light switch is the single-pole switch diagram. This diagram shows how a single switch controls a light fixture, with a hot wire bringing power to the switch and a neutral wire returning power to the fixture. By following the diagram, you can easily connect the wires and test the switch to ensure it is working correctly.
For more complex lighting setups, such as three-way switches or dimmer switches, there are specific wiring diagrams that show how multiple switches control a single light fixture. These diagrams can be more intricate, but they provide a clear guide on how to wire the switches together and ensure proper functionality.
When working with electrical wiring, it is important to follow safety guidelines and ensure that the power is turned off before making any connections. Always consult a professional electrician if you are unsure about any aspect of the wiring process, as incorrect wiring can lead to electrical hazards and potential fires.
In conclusion, electrical wiring diagrams for light switches are valuable tools that can help you install or repair lighting fixtures safely and efficiently. By following the diagrams and adhering to safety precautions, you can ensure that your electrical work is done correctly and meets all necessary regulations. Remember to always double-check your connections and test the switches before completing the installation to guarantee a successful and safe outcome.