Solar panels are a great way to harness renewable energy and reduce your carbon footprint. However, it’s important to understand how to properly wire your solar panels to ensure they are working efficiently and safely. In this article, we will discuss the basics of solar panel wiring diagram.
Before we dive into the wiring diagram, it’s important to note that solar panels generate direct current (DC) electricity. To use this electricity in your home, you will need an inverter to convert the DC electricity into alternating current (AC) electricity that can power your appliances and devices.
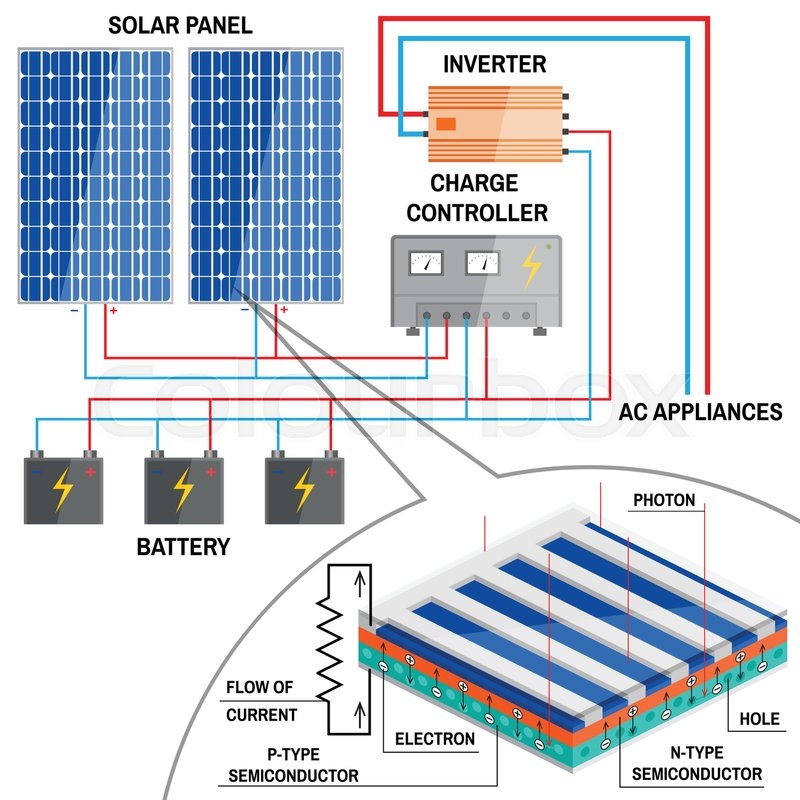
 Best 12 How To Make Solar Panel Wiring Connection In House Wiring (www.artofit.org)
When wiring your solar panels, it’s important to connect them in series or parallel. Connecting solar panels in series means that the positive terminal of one panel is connected to the negative terminal of the next panel. This increases the voltage output. Connecting solar panels in parallel means that all positive terminals are connected together and all negative terminals are connected together. This increases the current output.
Another important component of your solar panel wiring diagram is the charge controller. The charge controller regulates the amount of electricity going into your battery bank to prevent overcharging. It also protects your batteries from being over-discharged, which can reduce their lifespan.
Finally, make sure to ground your solar panel system to protect it from lightning strikes and other electrical surges. This involves connecting the metal frames of your solar panels, the mounting racks, and the inverter to a grounding rod buried in the ground.
In conclusion, understanding how to properly wire your solar panels is essential for maximizing their efficiency and ensuring the safety of your system. By following a solar panel wiring diagram and connecting your panels in series or parallel, using a charge controller, and grounding your system, you can enjoy clean and renewable energy for years to come.