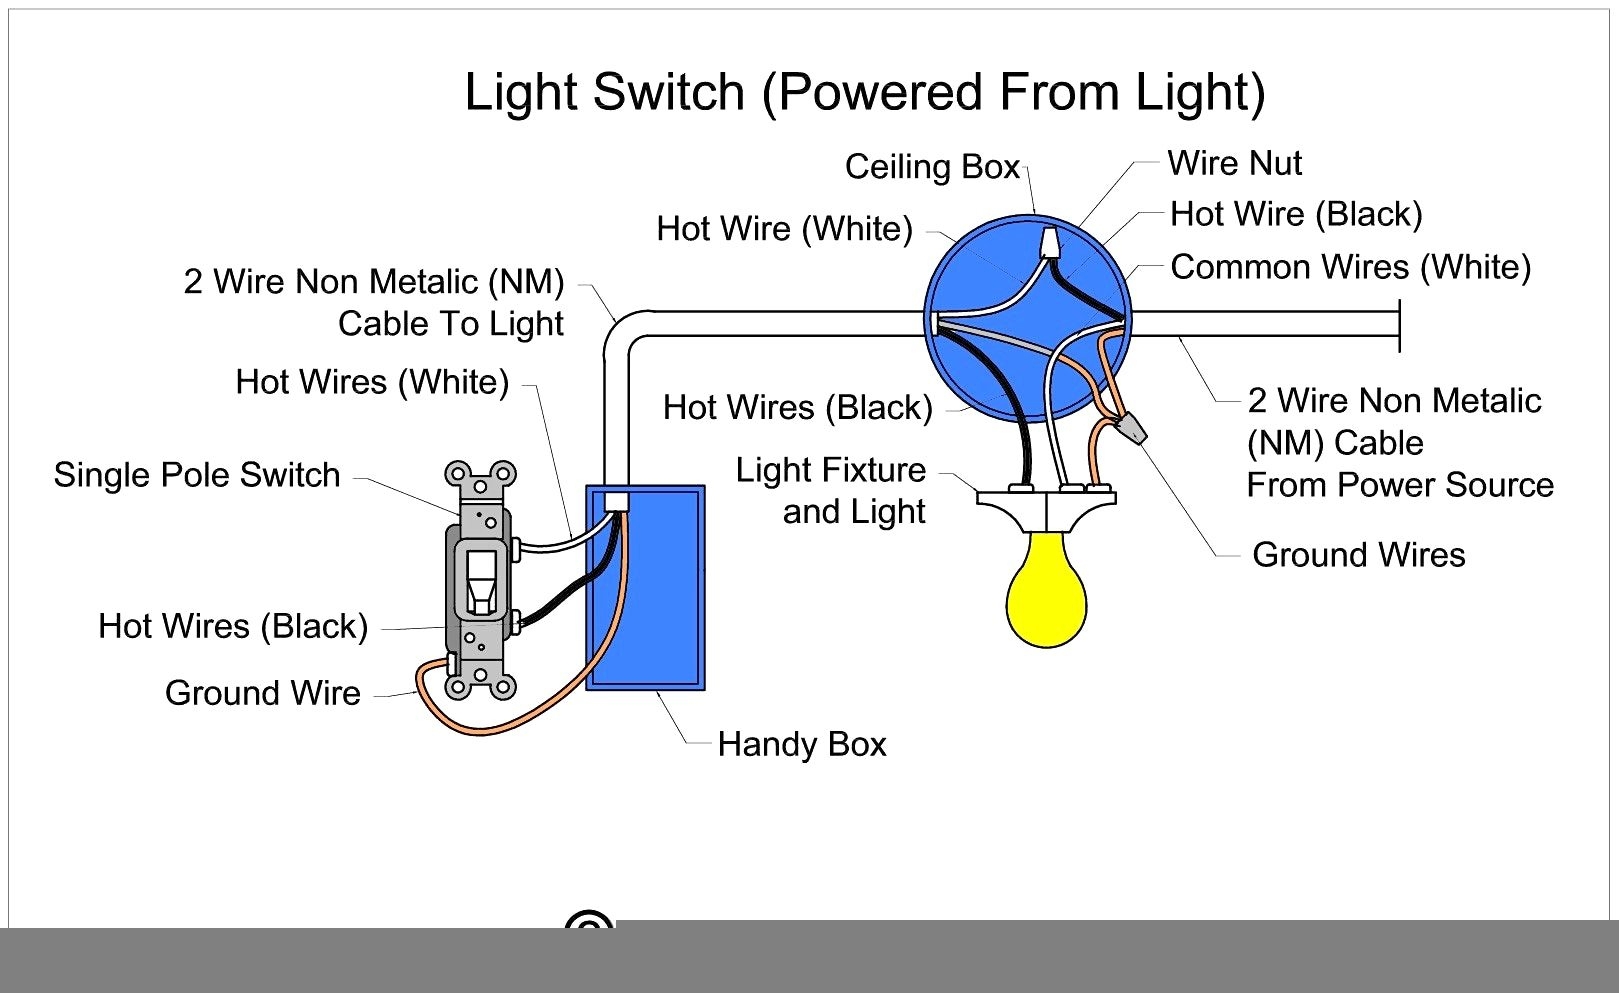
When it comes to installing or replacing a single pole switch in your home, it’s important to understand the wiring diagram to ensure the switch works properly. A single pole switch is the most common type of switch found in homes and is used to control lighting fixtures or outlets.
Before starting any electrical work, always remember to turn off the power at the circuit breaker to avoid any accidents. It’s also a good idea to double check with a voltage tester to make sure the power is off before proceeding with the installation.
 Double Pole Switch Wiring Diagram Esquilo Io (esquilo.io)
Here is a basic wiring diagram for a single pole switch:
– The black wire (hot wire) is connected to the brass screw on the switch.
– The white wire (neutral wire) is connected to the silver screw on the switch.
– The bare copper wire (ground wire) is connected to the green screw on the switch.
Once you have connected the wires to the appropriate screws on the switch, you can then mount the switch onto the electrical box and secure it in place. Make sure to test the switch before turning the power back on to ensure it is working correctly.
If you are unsure about any part of the wiring process, it’s always best to consult a licensed electrician to ensure the job is done safely and correctly.
Remember, safety should always be the top priority when working with electricity. Always follow proper procedures and guidelines to avoid any accidents or injuries. With the right knowledge and precautions, you can successfully install or replace a single pole switch in your home.
Now that you have a basic understanding of the wiring diagram for a single pole switch, you can confidently tackle this DIY project in your home. With the right tools and knowledge, you can easily upgrade your lighting fixtures or outlets with a new switch.