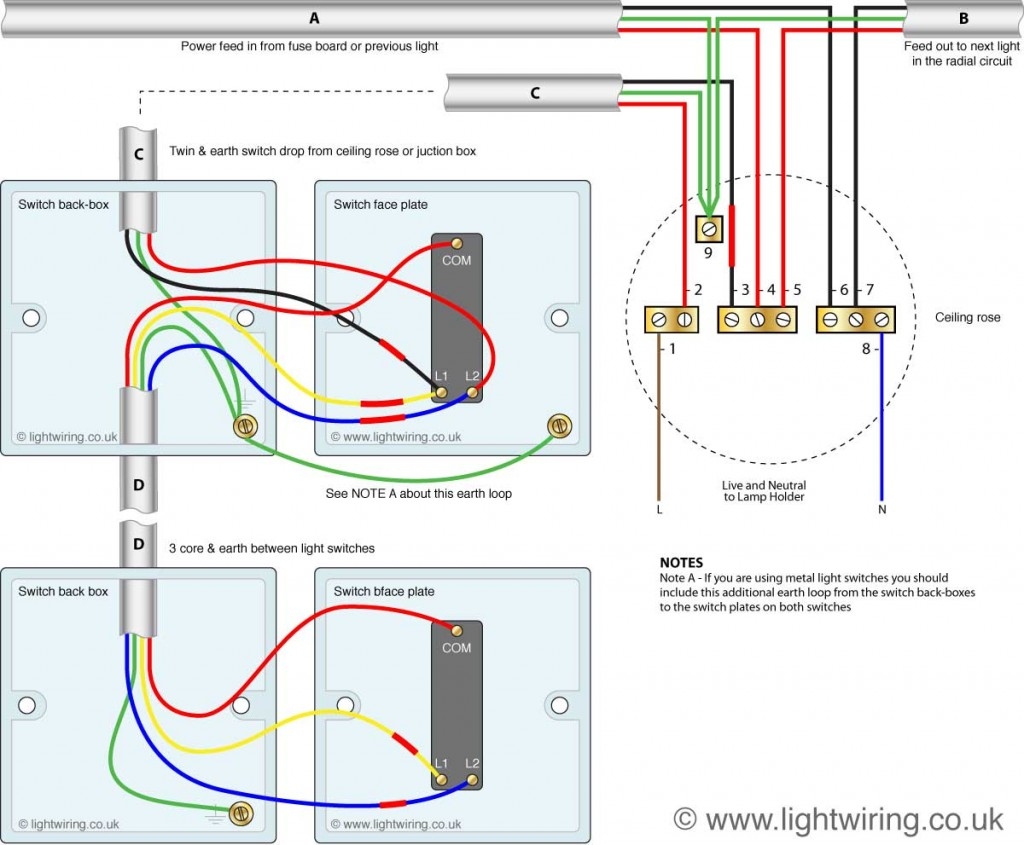
3 way switches are commonly used in residential electrical systems to control a light fixture from two different locations. This type of switch allows for greater flexibility in lighting control and can be a convenient option for rooms with multiple entry points.
Understanding how to wire a 3 way switch is essential for any homeowner looking to upgrade their lighting system. The wiring diagram for a 3 way switch can seem daunting at first, but with a little patience and the right tools, it can be easily accomplished.
 DIAGRAM 3 Way Switch Wiring Diagram Images WIRINGSCHEMA COM (wiringschema.com)
3 Way Switches Wiring Diagram
For a typical 3 way switch setup, you will need three wires – a hot wire, a traveler wire, and a ground wire. The hot wire carries the power from the electrical panel to the light fixture, while the traveler wire connects the two switches. The ground wire provides a safe path for electrical currents.
To wire a 3 way switch, you will connect the hot wire to the common terminal of the first switch, and then connect the traveler wire to the other two terminals. At the second switch, you will connect the traveler wire to the common terminal and the hot wire to the remaining terminal. Make sure to properly ground all connections to ensure safety.
When wiring a 3 way switch, it’s important to follow the correct color-coding for the wires. Typically, the hot wire is black, the traveler wires are red and black, and the ground wire is green or bare copper. Double-check all connections before turning on the power to avoid any electrical hazards.
Once you have successfully wired your 3 way switch, you can enjoy the convenience of controlling your light fixture from multiple locations. Whether it’s a hallway, staircase, or any room with two entry points, a 3 way switch can make lighting control a breeze.
In conclusion, understanding the wiring diagram for 3 way switches is essential for any homeowner looking to upgrade their lighting system. With the right tools and knowledge, wiring a 3 way switch can be a manageable DIY project. Follow the proper steps and safety precautions to ensure a successful installation.