When it comes to installing a thermostat in your home, it’s important to understand the wiring diagram to ensure proper installation. A 4 wire thermostat wiring diagram is a common configuration used in many homes. This type of wiring allows for control of both heating and cooling systems.
Before starting the installation process, it’s crucial to turn off the power to your HVAC system to prevent any accidents. Make sure to follow the manufacturer’s instructions carefully to avoid any mistakes in wiring the thermostat.
 Easy To Follow Carrier Edge Thermostat Wiring Diagram (wiringpictures.net)
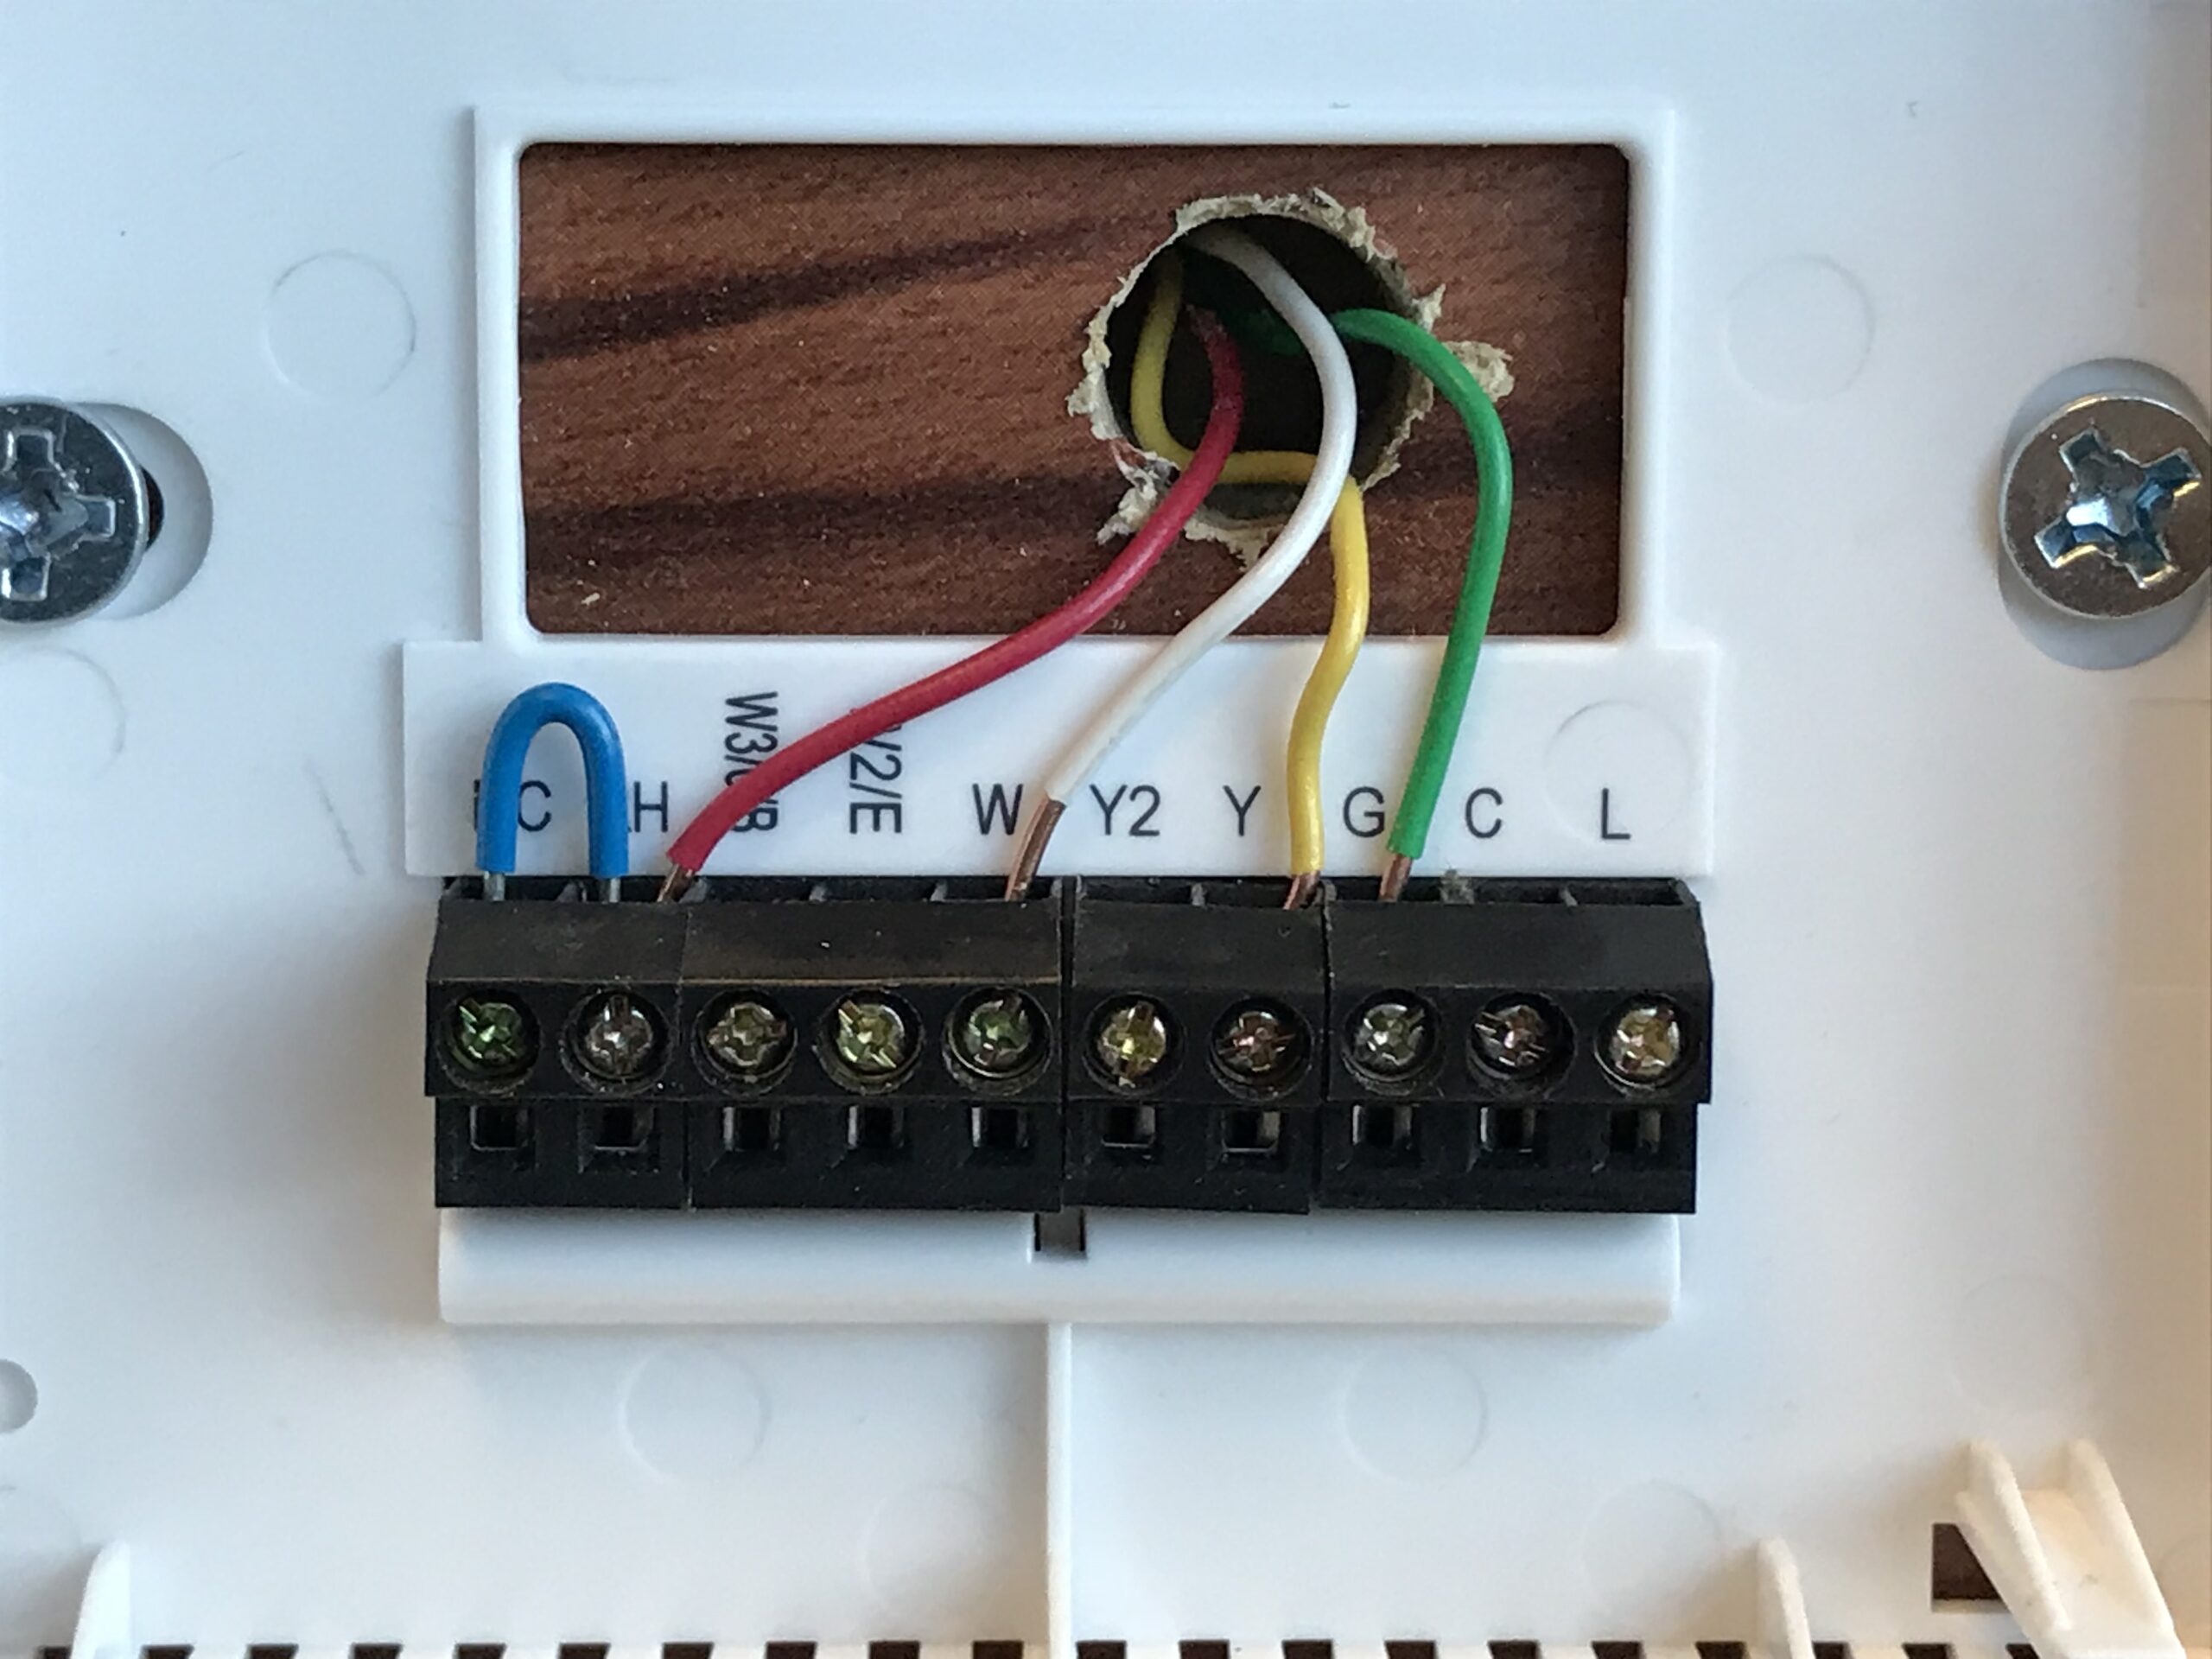
Typically, a 4 wire thermostat wiring diagram includes terminals labeled R (red), W (white), Y (yellow), and G (green). The R terminal is for the power supply, while the W terminal is for heating, the Y terminal is for cooling, and the G terminal is for the fan.
To begin the wiring process, connect the R wire to the R terminal, the W wire to the W terminal, the Y wire to the Y terminal, and the G wire to the G terminal. Make sure to secure the wires properly to prevent any loose connections that could cause malfunctions.
After connecting the wires, secure the thermostat to the wall and turn on the power to your HVAC system. Set the thermostat to your desired temperature and test the heating and cooling systems to ensure they are functioning correctly.
In conclusion, understanding a 4 wire thermostat wiring diagram is essential for a successful installation. By following the diagram and manufacturer’s instructions carefully, you can ensure that your thermostat works efficiently to keep your home comfortable year-round.