When it comes to installing a ceiling fan, it is important to have a clear understanding of the wiring diagram. A 4 wire ceiling fan allows for separate control of the fan and the light kit, making it a popular choice for many homeowners. By following the correct wiring diagram, you can ensure that your ceiling fan operates efficiently and safely.
Before you begin the installation process, make sure to turn off the power to the circuit at the breaker box. This will prevent any accidents or injuries while working on the wiring. Once the power is off, you can start by identifying the wires coming from the ceiling and the wires from the ceiling fan. The 4 wires typically include a black (hot) wire, a white (neutral) wire, a green (ground) wire, and a blue (light kit) wire.
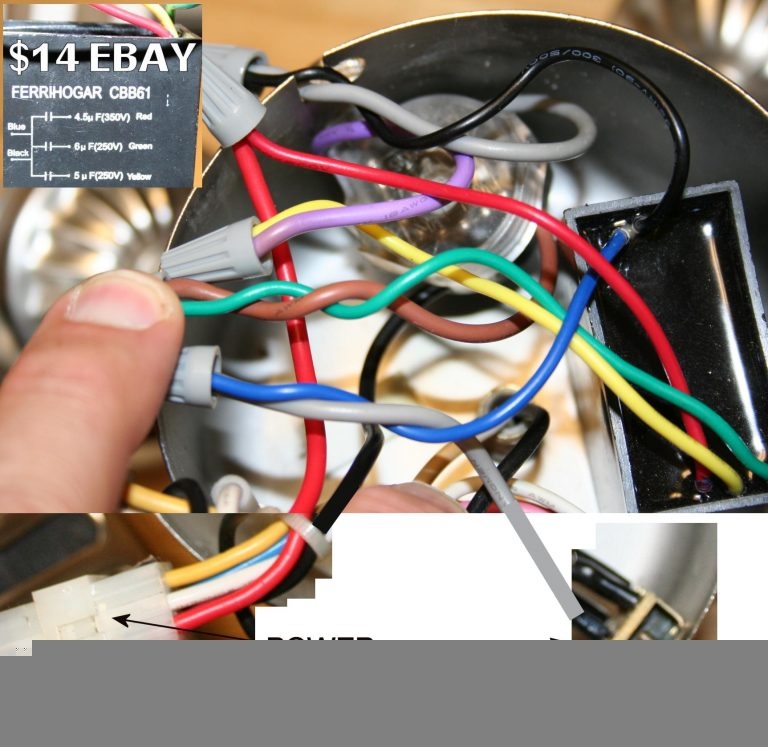
 4 Wire Ceiling Fan Capacitor Wiring Diagram Database Wiring Diagram (www.aiophotoz.com)
Next, you will need to connect the corresponding wires from the ceiling fan to the wires from the ceiling. The black wire from the ceiling fan should be connected to the black wire from the ceiling, the white wire to the white wire, the green wire to the green wire, and the blue wire to the blue wire (if your fan has a light kit). It is important to use wire nuts to secure the connections and ensure that they are properly insulated.
Once all the wires are connected, you can secure the ceiling fan to the ceiling using the provided mounting bracket. Make sure that the fan is properly balanced and secure before turning the power back on. Test the fan and light kit to ensure that they are functioning correctly. If everything is working properly, you can enjoy the comfort and convenience of your newly installed ceiling fan.
In conclusion, understanding the wiring diagram for a 4 wire ceiling fan is essential for a successful installation. By following the correct wiring instructions and taking necessary safety precautions, you can easily install a ceiling fan in your home. Enjoy the cool breeze and added lighting that a ceiling fan provides!