When it comes to wiring a 4-way switch, it can seem a bit daunting at first. However, with the right guidance and understanding of the wiring diagram, you can easily install a 4-way switch in your home. A 4-way switch is used in conjunction with two 3-way switches to control lighting from three or more locations.
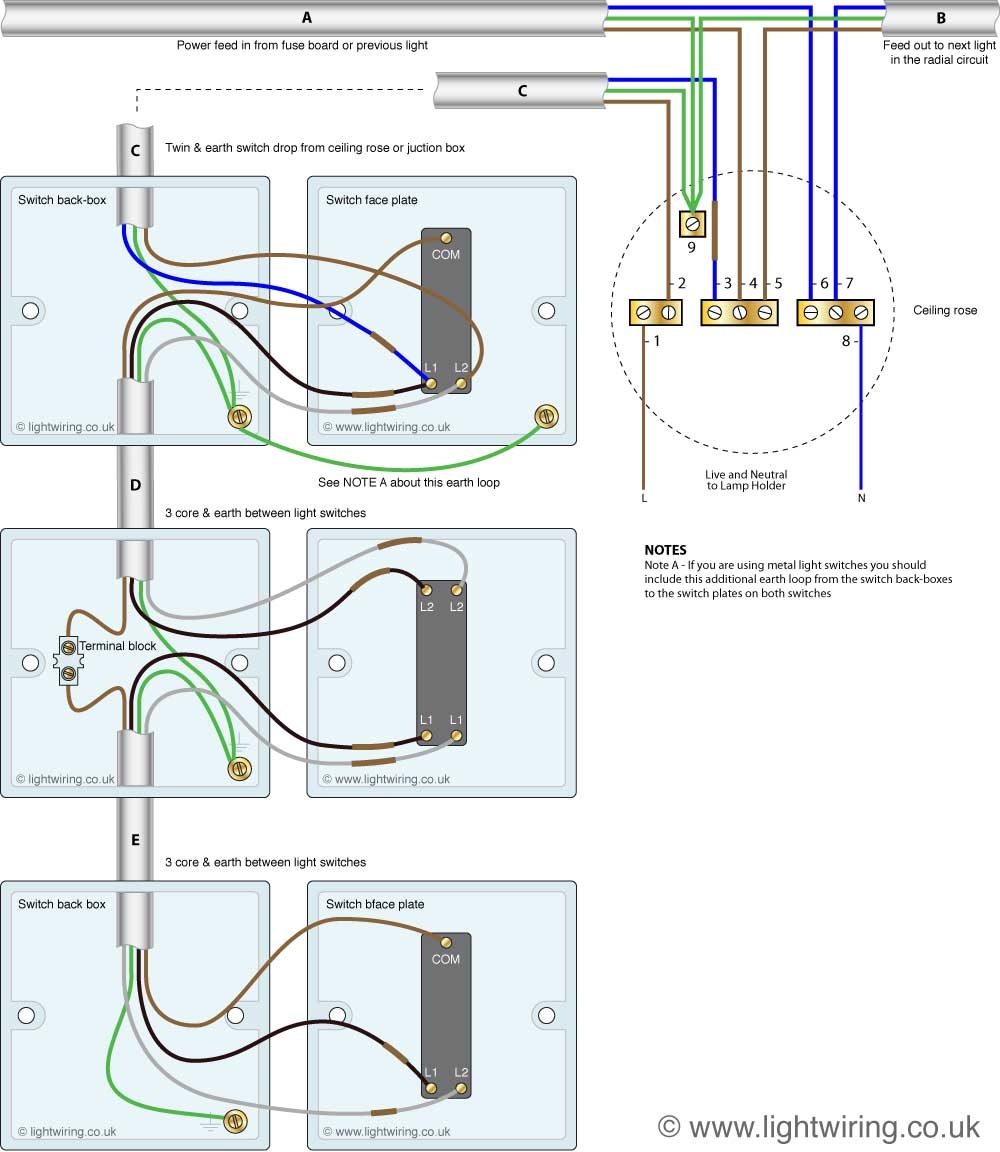
Understanding the wiring diagram is crucial when installing a 4-way switch. The diagram shows the connections between the switches and the lights. It helps you identify the traveler wires that connect the switches and the common wire that powers the light fixture. With a clear understanding of the wiring diagram, you can confidently wire a 4-way switch in your home.
 Eaton 4 Way Switch Wiring With Diagram Complete Guide Wiring Solver (wiringsolver.com)
Begin by turning off the power to the circuit at the breaker box. Remove the switch plate cover and the existing switch from the wall. Take note of the existing wiring and how it is connected to the switch. Follow the wiring diagram for the 4-way switch and connect the wires accordingly. Make sure to secure the connections with wire nuts and wrap them with electrical tape.
Once you have connected the wires to the 4-way switch, install the switch in the electrical box and secure it with screws. Replace the switch plate cover and turn the power back on at the breaker box. Test the switch to ensure it is working properly. If the light does not turn on, double-check your wiring connections against the diagram.
In conclusion, wiring a 4-way switch may seem complex at first, but with the right knowledge and following the wiring diagram, it can be a straightforward process. Remember to always turn off the power before working on any electrical installation and consult a professional if you are unsure. With a properly installed 4-way switch, you can easily control your lighting from multiple locations in your home.