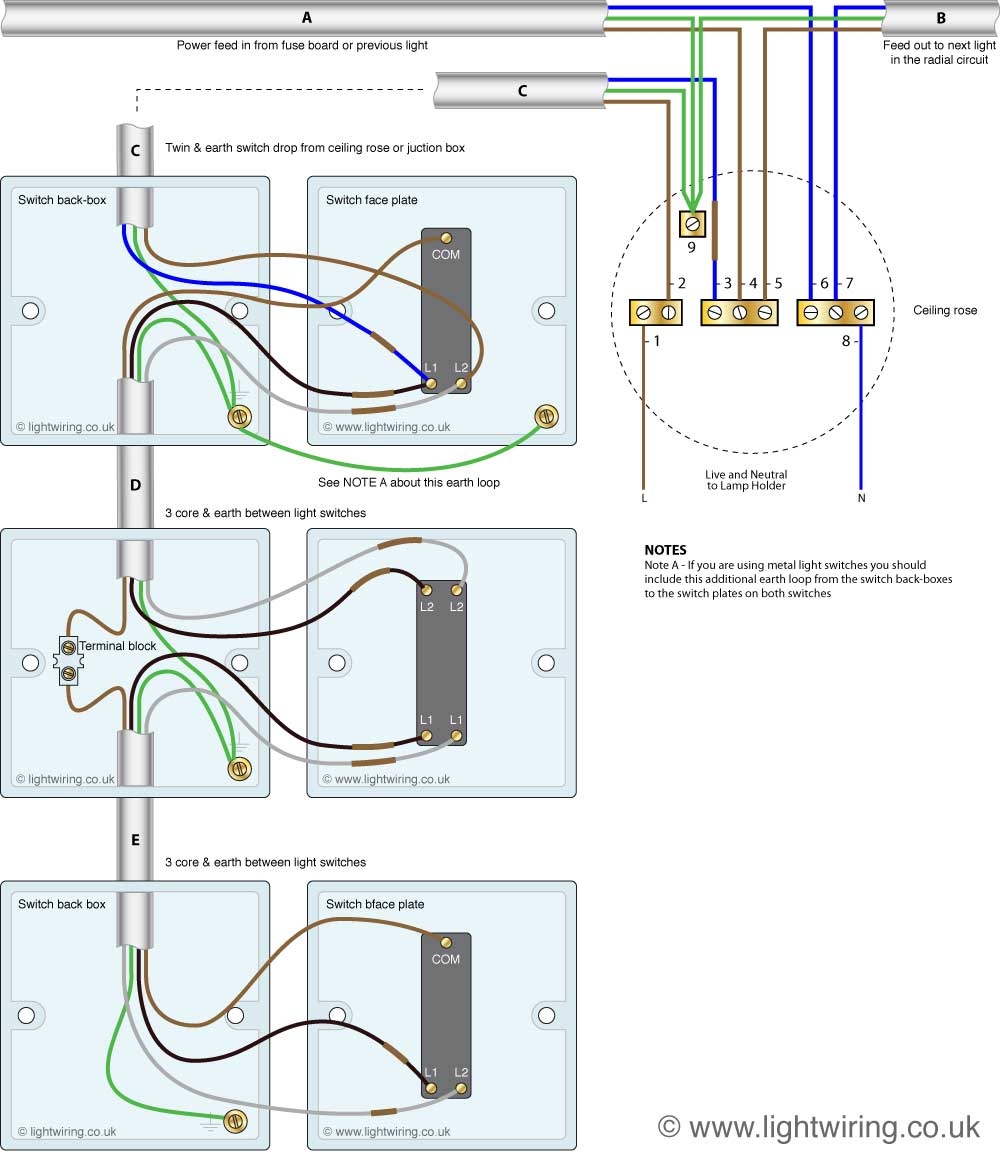
When it comes to wiring a three way light switch, it can be a bit confusing for those who are not familiar with electrical work. However, with the right instructions and a clear diagram, it can be a simple task to accomplish. A three way switch is used to control a light fixture from two different locations, such as at the top and bottom of a staircase.
Understanding the wiring diagram is crucial before starting the installation process. It is important to have a good grasp of which wires are hot, neutral, and travelers. The travelers are the wires that connect the two switches together and allow for the control of the light fixture from both locations.
 3 Way Electrical Wiring Diagram Guide And Instructions (schempro.com)
Start by turning off the power to the circuit at the breaker box to ensure safety during the installation process. Then, identify the common terminal on each switch, which is usually labeled as the dark-colored screw. Connect the hot wire to the common terminal on one switch, and the load wire to the common terminal on the other switch.
Next, connect the traveler wires to the remaining terminals on each switch. It is important to ensure that the travelers are connected to the correct terminals to allow for the proper operation of the switches. Once all the wires are securely connected, turn the power back on and test the switches to make sure they are working correctly.
If you are unsure about the wiring or need further assistance, it is always recommended to consult a professional electrician. They can provide guidance and ensure that the wiring is done correctly to prevent any safety hazards. With the right tools and knowledge, installing a three way light switch can be a manageable project for any homeowner.
Overall, understanding the wiring diagram and following the proper steps are essential when installing a three way light switch. By taking the time to familiarize yourself with the process, you can successfully control a light fixture from multiple locations with ease.