When it comes to installing or replacing a light switch in your home, having a clear understanding of the wiring diagram is crucial. A light switch wiring diagram helps you identify the different wires and terminals, making the installation process much easier and safer.
Whether you are a DIY enthusiast or a professional electrician, having a good grasp of light switch wiring diagrams is essential for any electrical work. Knowing how to properly connect the wires can prevent accidents and ensure that your lights function correctly.
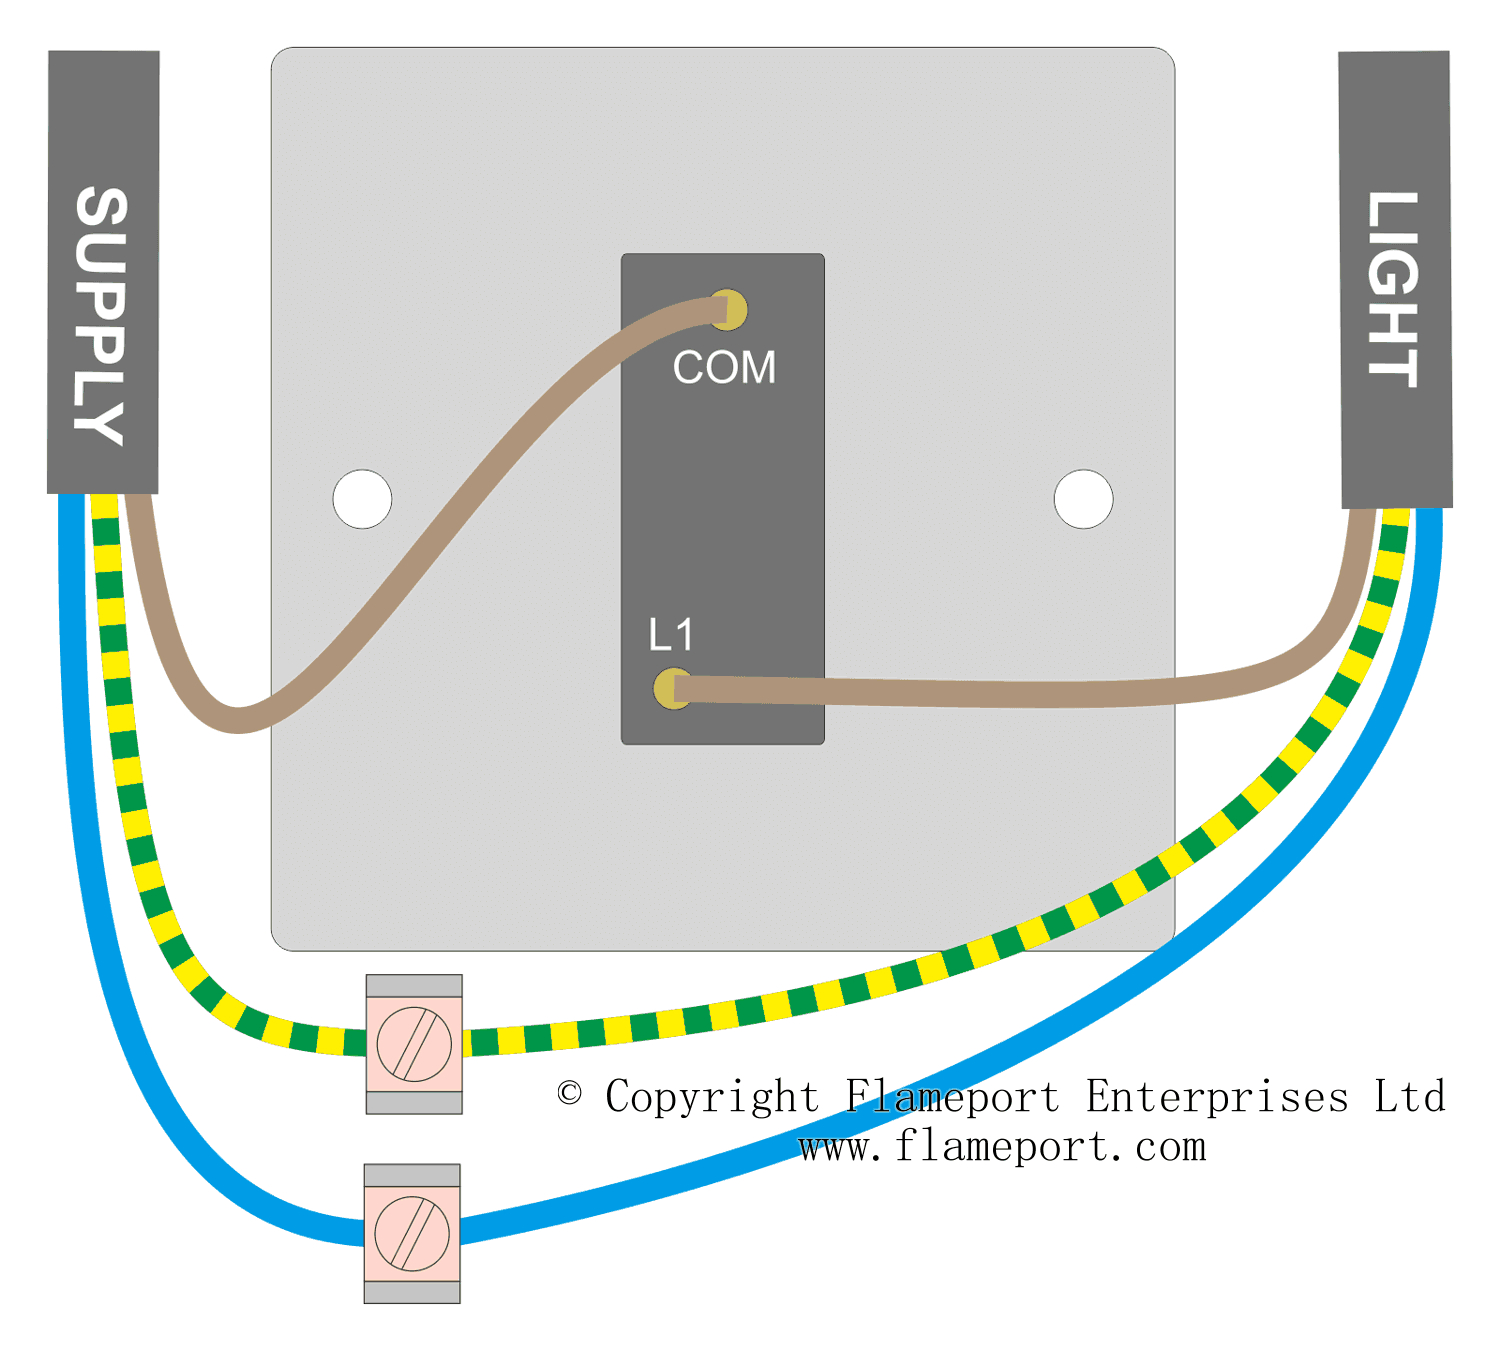
 Understand The Basics Of Door Jamb Switch Wiring Diagrams Moo Wiring (moowiring.com)
Understanding the Wiring Diagram
Light switch wiring diagrams typically show the connections between the switch, the power source, and the light fixture. The diagram will include the hot wire, neutral wire, and ground wire, as well as any additional wires needed for three-way or four-way switches.
Before starting any electrical work, it is important to turn off the power to the circuit at the breaker box. Use a voltage tester to confirm that the power is off before proceeding with the installation. Follow the wiring diagram carefully to ensure that all connections are made correctly.
When connecting the wires, it is important to use the proper wire connectors and to secure all connections with electrical tape. Make sure to follow local building codes and regulations when installing a light switch to ensure safety and compliance.
Once the wiring is complete, turn the power back on and test the light switch to make sure it is working properly. If you encounter any issues, double-check the wiring diagram and connections to troubleshoot the problem.
In conclusion, understanding a light switch wiring diagram is essential for anyone working with electrical systems. By following the diagram carefully and taking the necessary safety precautions, you can install or replace a light switch with confidence and peace of mind.