Doorbells are an essential part of any home, providing a convenient way for visitors to announce their arrival. Having a properly functioning doorbell requires a correct wiring setup. Understanding the wiring diagram for a doorbell can help you troubleshoot any issues that may arise.
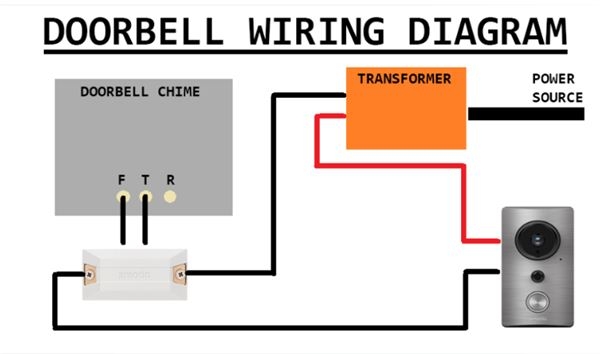
When it comes to wiring a doorbell, there are a few key components to keep in mind. The transformer is responsible for converting the standard household voltage to a lower voltage that is suitable for the doorbell. The doorbell button is what visitors press to ring the doorbell, while the chime is the sound-producing device that alerts you of someone at the door.
 6 Easy Steps To Wire A Doorbell (www.pinterest.com)
One common wiring setup for a doorbell includes connecting the transformer to the doorbell button and chime. The transformer is typically installed near the main electrical panel, with one wire connected to the transformer’s “C” terminal and the other wire connected to the transformer’s “T” terminal. The wire from the “T” terminal is then connected to one terminal of the doorbell button, while the other terminal of the button is connected to one terminal of the chime. Finally, the other terminal of the chime is connected back to the transformer’s “C” terminal.
It’s important to follow the wiring diagram for your specific doorbell model to ensure proper installation. If you encounter any issues with your doorbell, such as it not ringing or producing a weak sound, you may need to troubleshoot the wiring connections. Checking for loose or damaged wires and ensuring that all connections are secure can help resolve any problems.
In conclusion, understanding the wiring diagram for a doorbell is essential for maintaining a properly functioning doorbell system in your home. By following the correct wiring setup and troubleshooting any issues that arise, you can ensure that your doorbell continues to provide a reliable way for visitors to announce their arrival.