When it comes to installing a ceiling fan, it’s important to understand the wiring diagram to ensure proper installation and functionality. The wiring diagram provides a visual representation of how the fan should be wired, including the connections for the fan motor, light kit, and wall switch.
Before starting the installation process, it’s crucial to familiarize yourself with the wiring diagram to avoid any confusion or mistakes. This will help ensure that the fan is properly wired and operates safely.
 Hunter Wiring Diagram Wiring Diagram Data Hunter Ceiling Fan Wiring (2020cadillac.com)
Wiring the Ceiling Fan
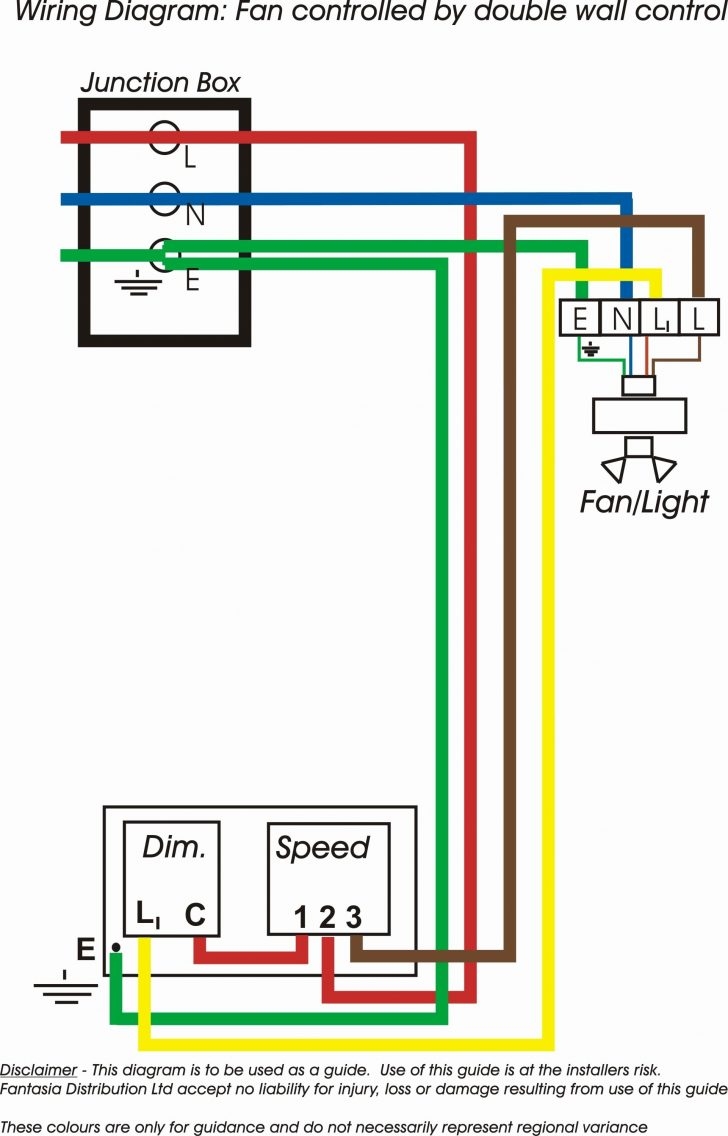
The wiring diagram for a ceiling fan typically includes color-coded wires for easy identification. The black wire is usually for the fan motor, the blue wire is for the light kit, the white wire is the neutral wire, and the green or copper wire is the ground wire.
Start by turning off the power to the circuit at the breaker box before beginning any work. Then, follow the wiring diagram to connect the wires from the ceiling fan to the corresponding wires in the ceiling. Make sure to secure all connections with wire nuts and electrical tape.
Once all the wires are connected, mount the ceiling fan to the ceiling according to the manufacturer’s instructions. After securing the fan in place, turn the power back on and test the fan to ensure it is functioning correctly.
If you are unsure about any part of the installation process, consult a professional electrician to avoid any safety hazards. It’s always better to seek help from a professional when dealing with electrical wiring to ensure a safe and successful installation.
In conclusion, understanding the ceiling fan wiring diagram is essential for a successful installation. By following the diagram and taking the necessary precautions, you can enjoy a cool and comfortable environment in your home with a properly installed ceiling fan.