When it comes to setting up your electric bike, understanding the wiring diagram for the controller is crucial. The controller is the brain of your e-bike, controlling the speed, acceleration, and overall performance of your electric bike. With a 48 Volt 48v controller, it is important to know how to properly wire it to ensure optimal functioning.
Before diving into the wiring diagram, make sure you have all the necessary tools and components on hand. This includes the controller itself, wires, connectors, and a basic understanding of electrical circuits. Once you have everything ready, you can start following the wiring diagram to connect the controller to the motor, battery, throttle, and other components of your e-bike.
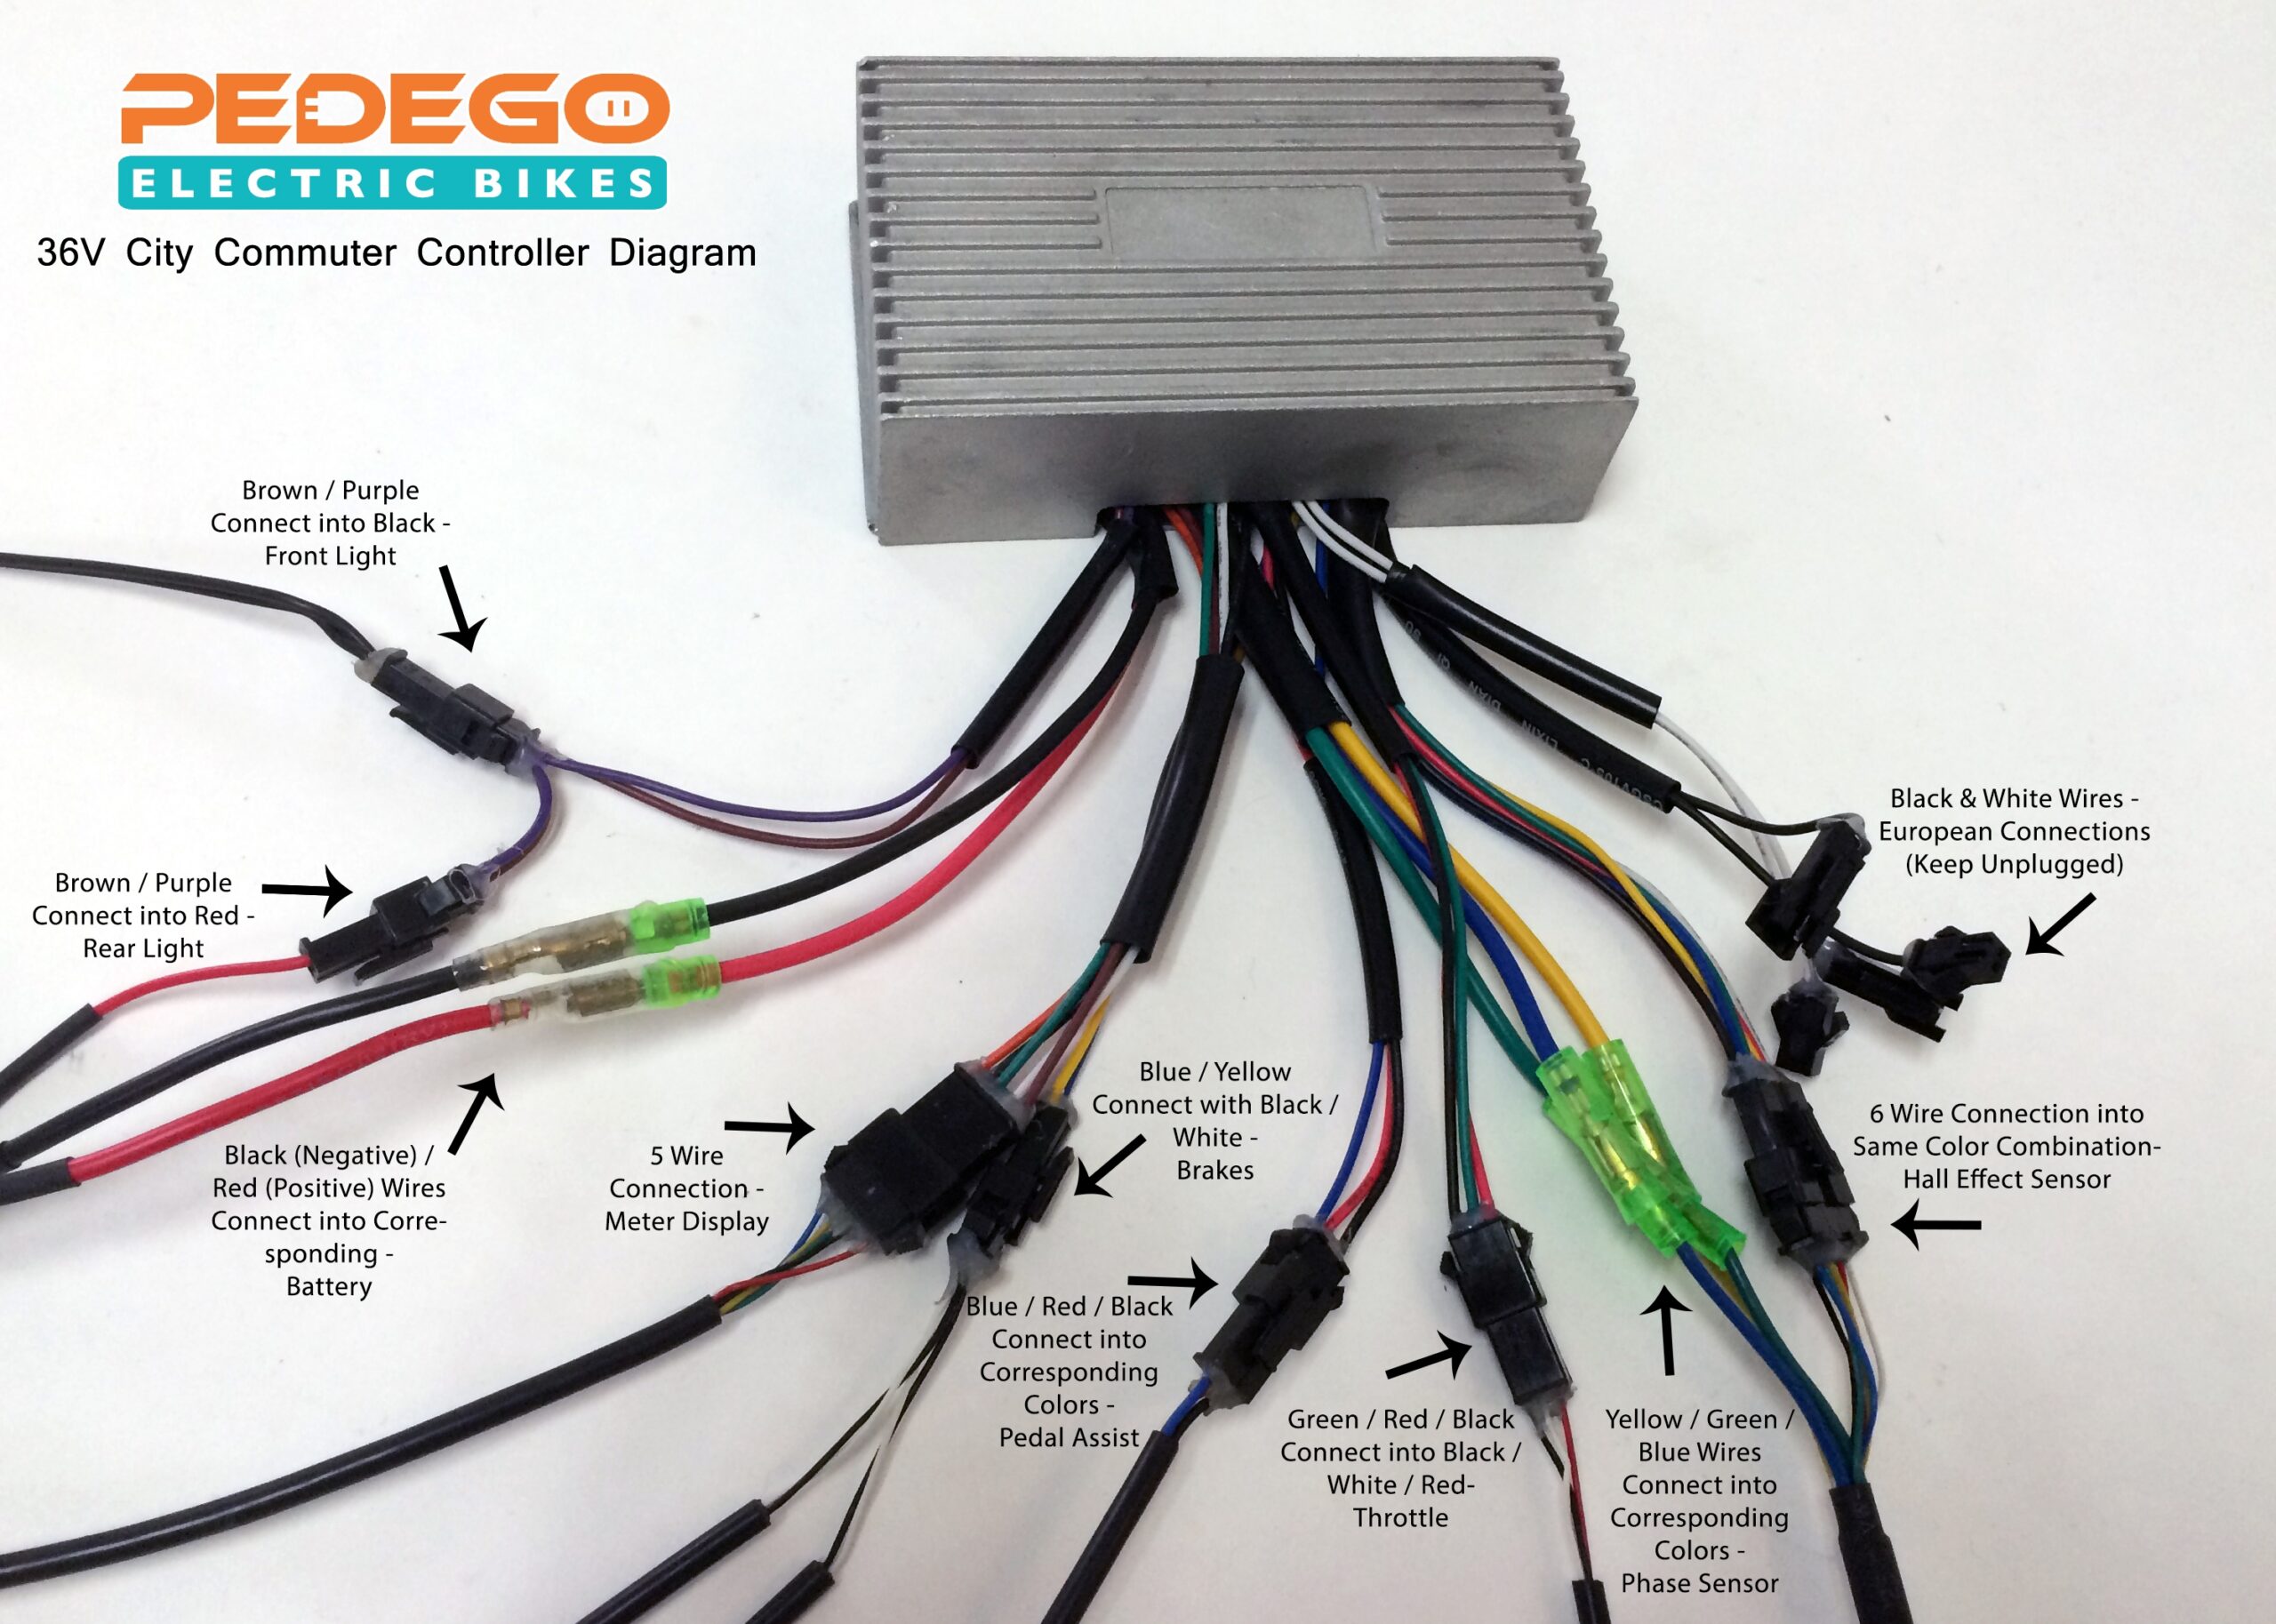
 36 Volt E Bike Controller Wiring Diagram (circuitdiagramtids.z21.web.core.windows….)
Start by identifying the key components of the controller, including the power wires, motor wires, and throttle wires. Refer to the wiring diagram provided by the manufacturer to determine which wires need to be connected to each component. It is important to follow the diagram carefully to avoid any potential damage to the controller or other parts of your e-bike.
Next, carefully connect each wire according to the diagram, making sure to securely fasten them with the appropriate connectors. Double-check your connections to ensure they are correct before powering on your electric bike. Once everything is properly wired, you can test the controller to make sure it is functioning as intended.
By following the wiring diagram for your 48 Volt 48v e-bike controller, you can ensure that your electric bike operates smoothly and efficiently. Proper wiring is essential for the overall performance and longevity of your e-bike, so take the time to carefully connect each component according to the diagram provided. With the right tools and knowledge, you can set up your e-bike controller with confidence and enjoy a seamless riding experience.
In conclusion, understanding the wiring diagram for your 48 Volt 48v e-bike controller is essential for proper setup and operation of your electric bike. By following the diagram provided by the manufacturer and connecting each component correctly, you can ensure that your e-bike functions optimally. Take the time to wire your controller carefully and test it before hitting the road to enjoy a smooth and efficient ride.