When it comes to towing a trailer, having the right wiring setup is crucial for safety and functionality. A 4 pin trailer wiring diagram is a standard way to connect your trailer lights to your vehicle, making it easy to signal and brake while on the road.
Whether you’re hauling a boat, camper, or utility trailer, understanding how to wire your trailer lights is essential. With a 4 pin wiring setup, you can easily connect your trailer lights to your vehicle’s electrical system, ensuring that other drivers can see your signals and brake lights.
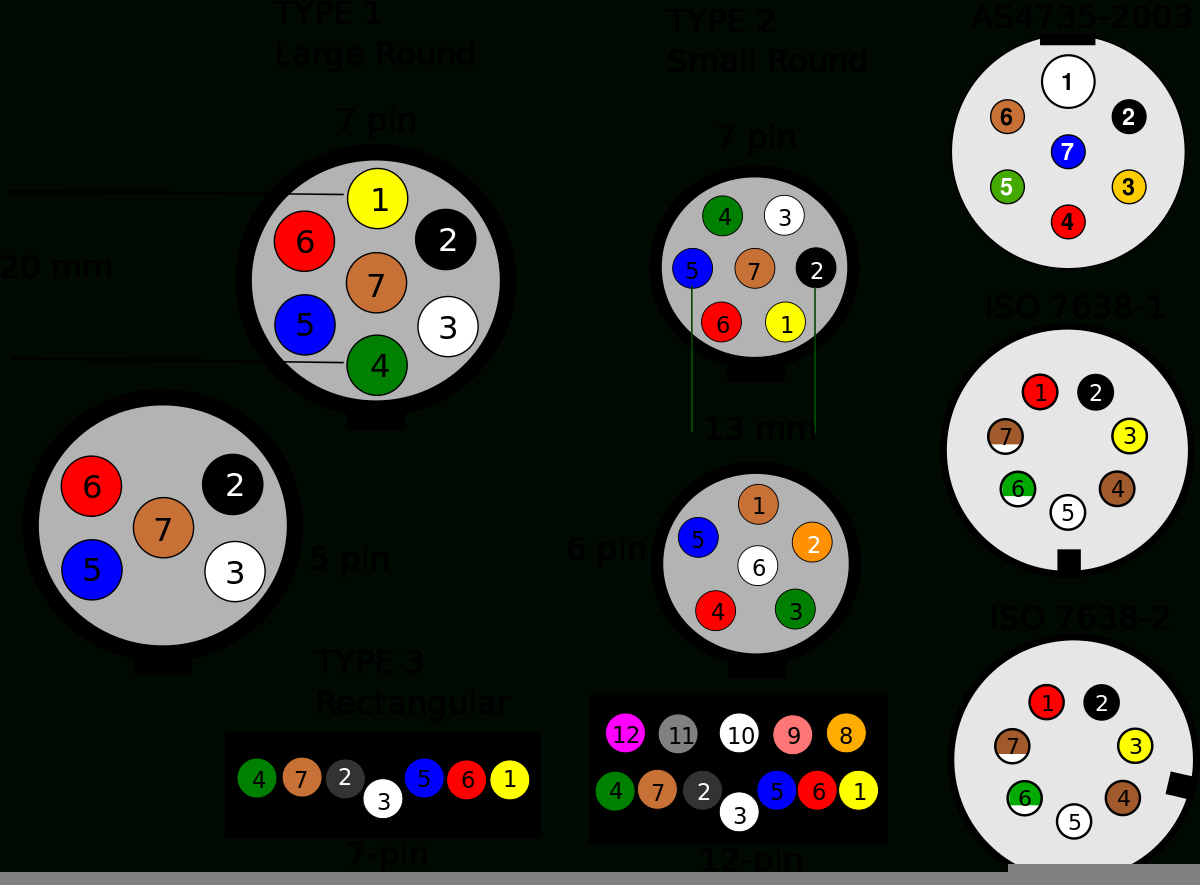
 7 Pin Semi Trailer Wiring Diagram (www.tankbig.com)
Typically, a 4 pin trailer wiring diagram includes connections for the tail lights, brake lights, turn signals, and ground wire. By following the diagram and properly connecting each wire, you can ensure that your trailer lights work seamlessly with your vehicle.
To start, you’ll need to identify the wires on both your vehicle and trailer. The 4 pin wiring setup typically includes a white wire for ground, a brown wire for tail lights, a yellow wire for left turn/brake lights, and a green wire for right turn/brake lights. By matching these wires from your vehicle to your trailer, you can create a secure electrical connection.
Once you’ve identified the wires, you can begin connecting them using butt connectors or soldering for a more permanent solution. Make sure to test your trailer lights after connecting each wire to ensure they are functioning correctly. Additionally, using wire loom or electrical tape can help protect the wires from the elements and prevent any potential damage.
In conclusion, a 4 pin trailer wiring diagram is a simple and effective way to connect your trailer lights to your vehicle. By following the diagram and properly connecting each wire, you can ensure safe and reliable towing. Remember to test your lights before hitting the road to ensure that your signals and brake lights are working properly.