When it comes to wiring a 4 Ohm dual voice coil subwoofer, it’s important to understand the basics of how to properly connect the coils for optimal performance. By following a wiring diagram specifically designed for dual voice coil subwoofers, you can ensure that your system operates efficiently and effectively.
One of the key benefits of using a dual voice coil subwoofer is the flexibility it offers in terms of wiring options. With two separate voice coils, you have the ability to wire the subwoofer in different configurations to achieve the desired impedance and power handling capabilities.
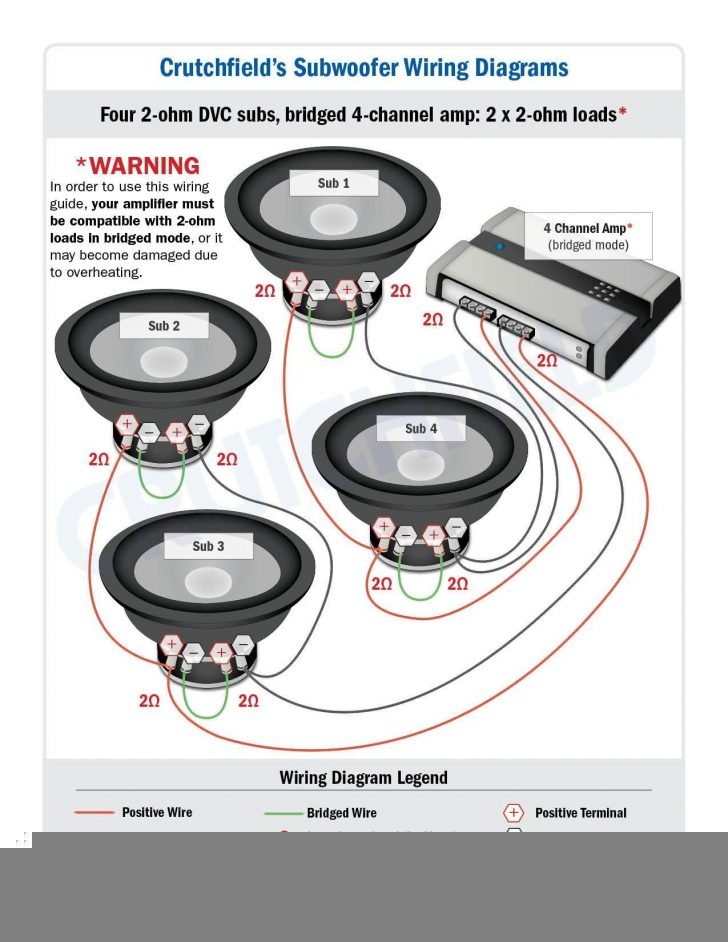
 2 4 Ohm Dual Voice Coil Wiring Diagram (stewart-switch.com)
For a 4 Ohm dual voice coil subwoofer, there are a few different wiring options available. One common method is to wire the coils in parallel, which results in a 2 Ohm load. This configuration allows for maximum power output from your amplifier while maintaining a stable impedance.
Another option is to wire the coils in series, which will result in an 8 Ohm load. While this configuration may not provide as much power as wiring in parallel, it can be a good choice if you want to match the impedance of other speakers in your system.
It’s important to carefully follow a wiring diagram when connecting the coils of a dual voice coil subwoofer. Incorrect wiring can result in damage to the subwoofer or amplifier, so it’s crucial to double-check your connections before powering up your system.
Overall, understanding how to properly wire a 4 Ohm dual voice coil subwoofer is essential for achieving the best possible performance from your audio system. By following a wiring diagram and choosing the right configuration for your setup, you can enjoy powerful, clear bass from your subwoofer.