When it comes to lighting in a room, having the ability to control the lights from multiple locations can be very convenient. This is where a 3 way light switching wiring diagram comes in handy. By using this wiring method, you can control a single light fixture from two different locations.
Understanding how to wire a 3 way switch is essential for any homeowner or electrician looking to make changes to their lighting setup. With a basic understanding of electrical wiring and the right tools, you can easily install a 3 way switch in your home.
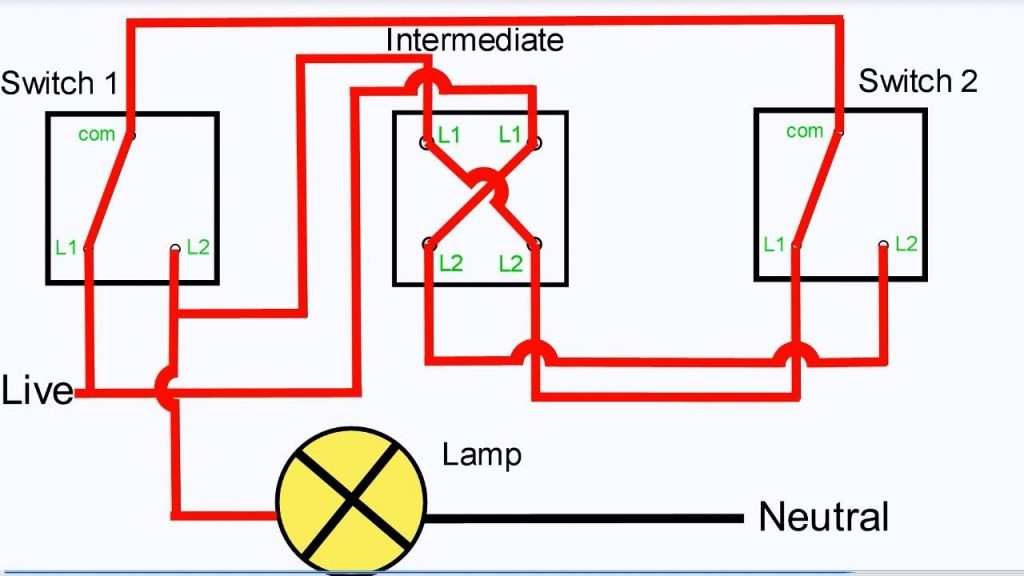
 3 Way Light Switching Wiring Diagram AndersGarnow (www.andersgarnow.com)
Here is a simple guide to help you understand the wiring diagram for a 3 way light switching setup:
Wiring Diagram
1. Start by turning off the power to the circuit at the breaker box. This is essential for safety when working with electrical wiring.
2. Identify the power source and the light fixture that you want to control. The power source will be connected to the common terminal of the first switch, while the light fixture will be connected to the common terminal of the second switch.
3. Connect the traveler wires between the two switches. These wires will allow the switches to communicate with each other and control the flow of electricity to the light fixture.
4. Finally, connect the ground wires to the switches and the metal box. This will provide a safe path for electricity to flow and prevent any potential hazards.
5. Once all the wires are properly connected, turn the power back on and test the switches to ensure they are working correctly. You should now be able to control the light fixture from both locations using the 3 way switches.
With this wiring diagram, you can easily install a 3 way light switching setup in your home and enjoy the convenience of controlling your lights from multiple locations. Remember to always follow safety guidelines when working with electrical wiring and consult a professional if you are unsure about any step in the process.